


Do you find getting started with Python on a Mac a bit confusing at first, especially with the different versions and system settings involved?
The setup itself is not difficult, but a few small checks and steps can make the process much smoother. Once everything is in place, working with Python becomes simple and consistent for everyday tasks and learning.
It also helps to know what needs attention before installation so nothing breaks midway. This blog clearly and simply walks through how to install Python on Mac, so everything stays on track from start to finish.
Why Do You Need to Install Python Separately on Mac?
The pre-installed Python on macOS isn’t updated regularly and often falls behind current releases. This can cause compatibility issues when working with newer libraries or frameworks.
Many modern packages and tools are built to support only recent Python versions. Using the outdated system version can lead to installation failures or unexpected errors.
Installing Python separately gives you full control over which version you use and when to update it. This ensures your development environment stays compatible with the tools your projects require.
Things to Check Before Installing Python
Before finding the best way to install Python on Mac, you need to confirm a few system requirements and existing setups. This ensures the installation process does not conflict with older versions or missing tools.
- Check the macOS version by going to About This Mac
- Verify the existing Python version using: python3 –version
- Install Command Line Tools using: xcode-select –install if needed
- Ensure the Terminal is working properly for running commands
- Make sure system updates are installed for compatibility
- Check the available storage space for smooth installation
- Confirm the internet connection is stable for downloading packages
- Remove or note older Python installations to avoid conflicts
- Verify Homebrew is installed if you plan to manage Python via it
- Check the system PATH settings to ensure Python runs correctly after installation
- Ensure you have admin access for installing system tools and packages
How to Install Python on Mac?
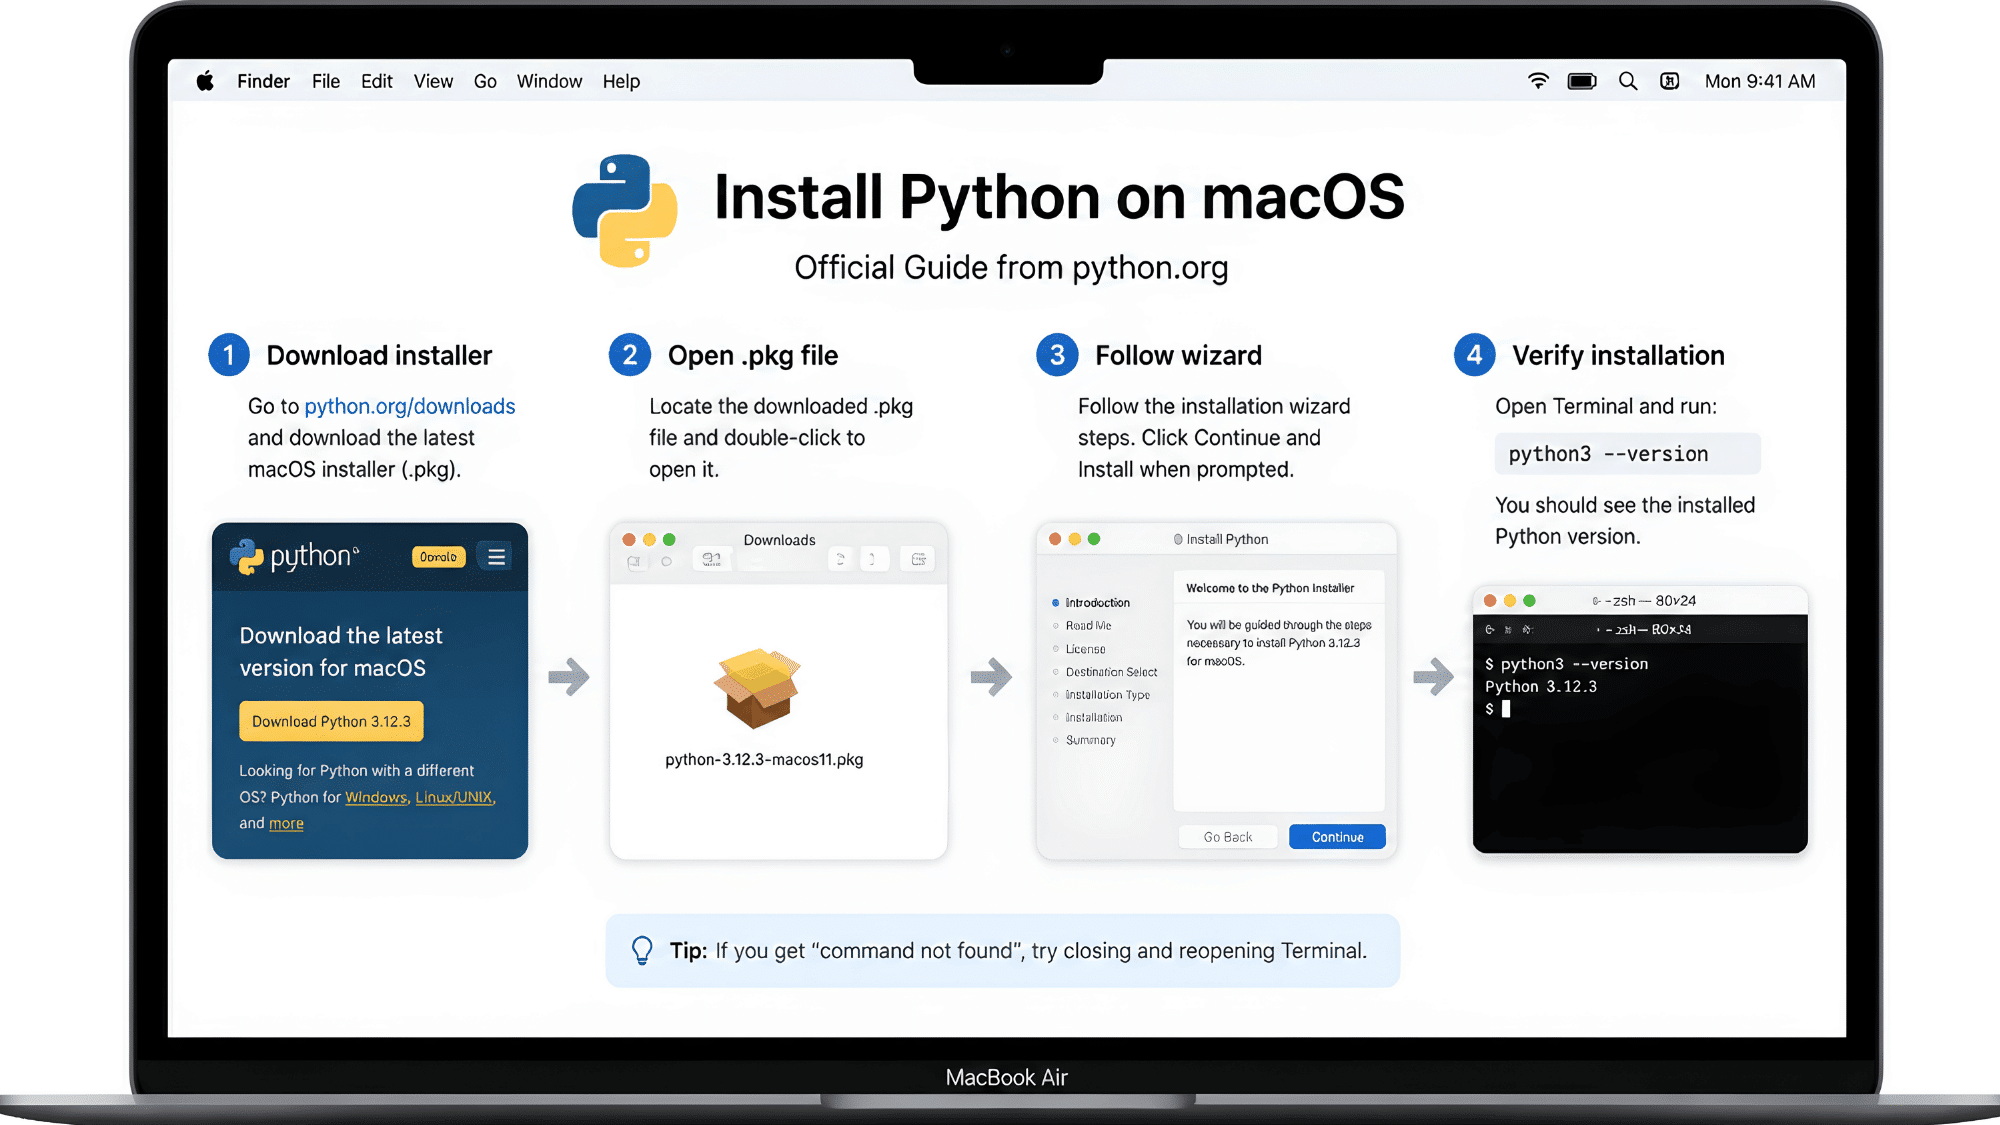
Installing Python on Mac is simple when you use the official Python.org installer. It provides a safe, beginner-friendly setup without requiring any terminal complexity.
Follow the steps below to complete the installation correctly from start to finish:
Step 1: Visit the Official Python Website
Start by accessing the official, secure source to download Python. This ensures you avoid unsafe or outdated files and always get the latest version supported for macOS.
- Open your browser and go to python.org/downloads
- The website auto-detects your Mac system version
- It suggests the best compatible macOS installer
- Always prefer the official site for safety and updates
Step 2: Download the macOS Installer Package
Once you are on the official site, the next step is to download the installer file. This file contains everything needed to install Python properly on your system.
- Click the download button for the latest
.pkgfile - The file will be saved in your Downloads folder
- Choose the most recent stable version for reliability
- Wait until the download completes fully before opening
Step 3: Open the Downloaded Installer
After downloading, you need to launch the setup file to begin installation. This opens a guided installer that simplifies the process.
- Go to Finder → Downloads
- Double-click the
.pkgfile to start setup - The installation wizard will open automatically
- Click “Continue” to move through the setup screens
Step 4: Follow the Installation Steps
Now you proceed through the actual installation process. This step ensures Python files are correctly added to your Mac system.
- Read and accept the license agreement
- Select the default installation location
- Click “Install” to begin setup
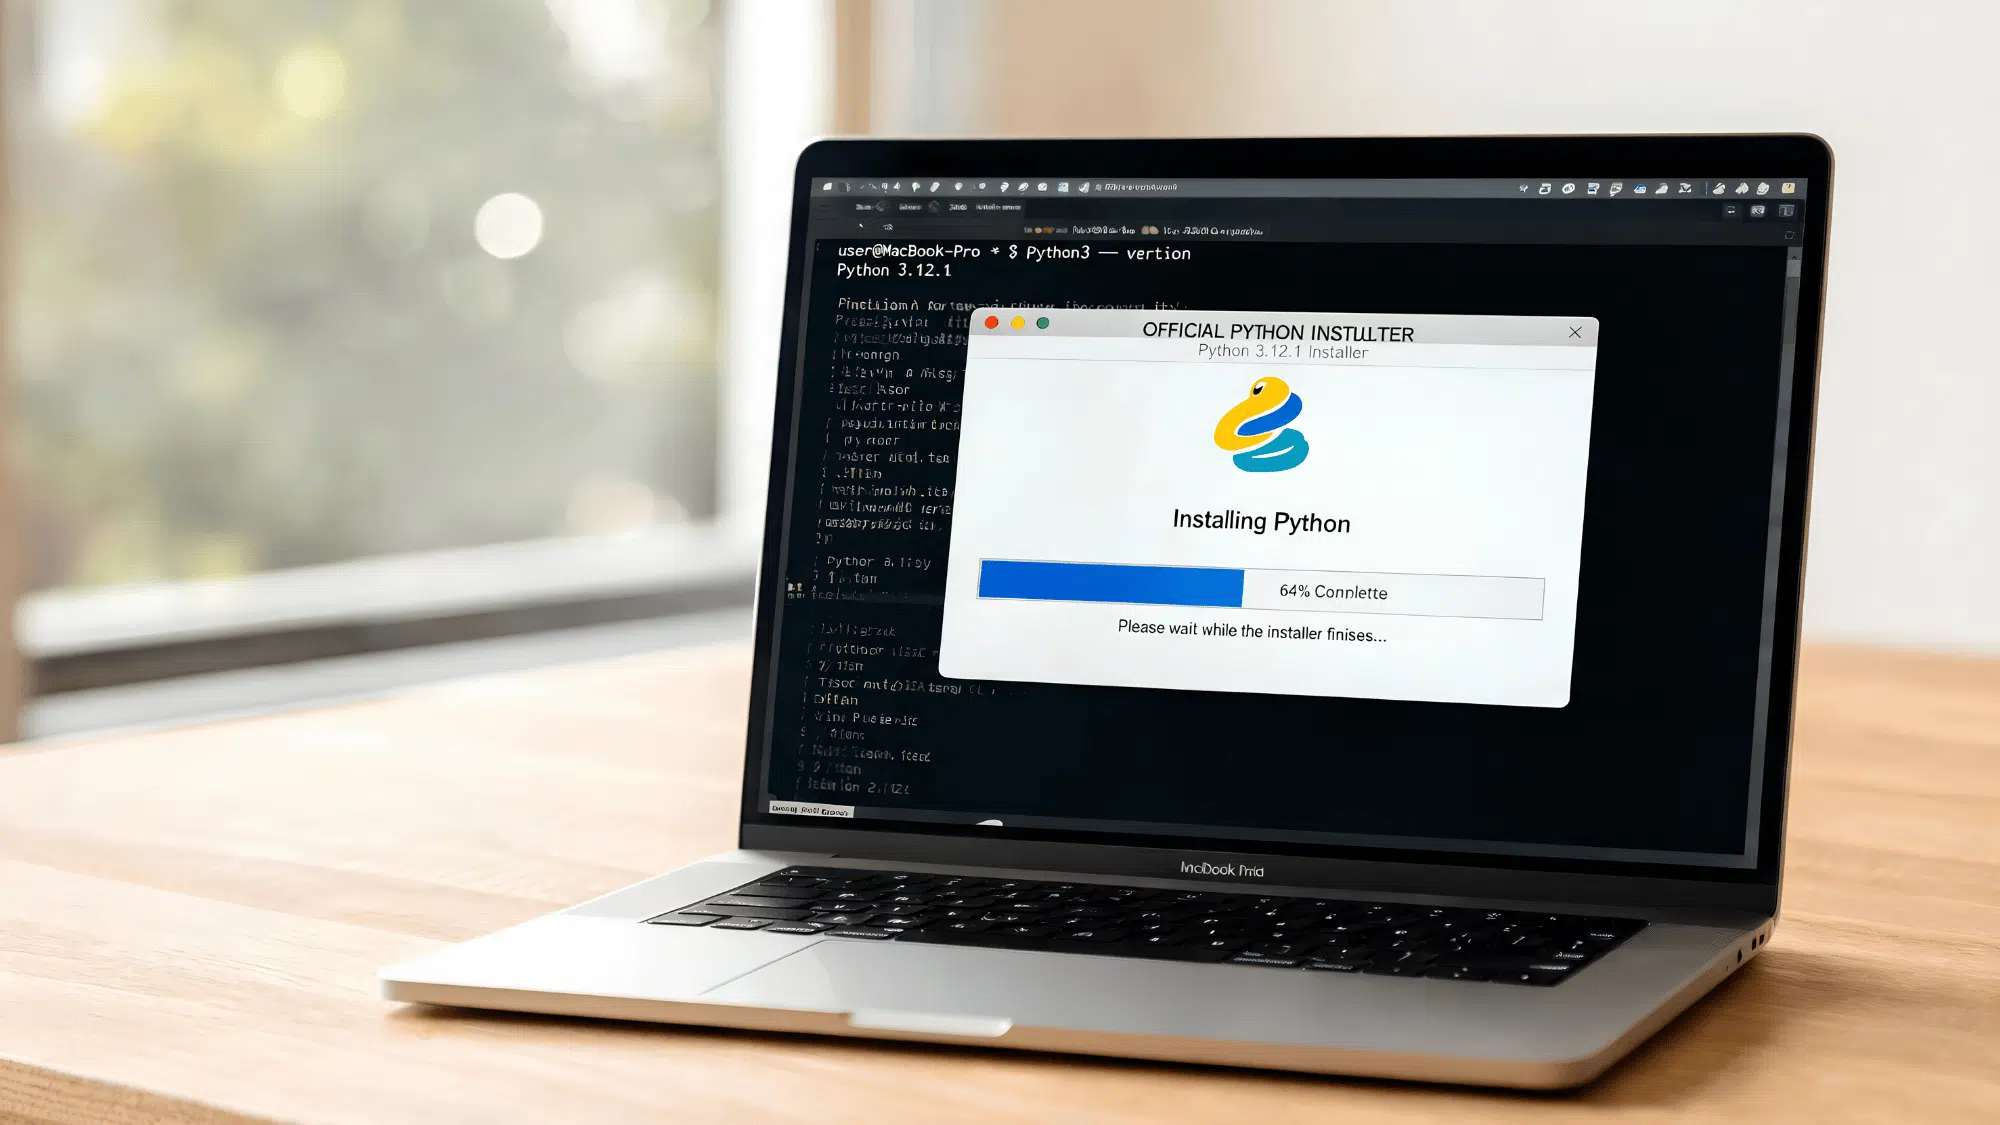
- Wait for the progress bar to complete fully
Step 5: Allow System Permissions
MacOS may ask for permission to install software on your device. This step ensures Python is properly authorized and added to system folders.
- Enter your Mac administrator password when prompted
- Allow any security or system permissions
- Confirm installation prompts from macOS
- Wait until permissions are fully processed
Step 6: Verify the Installation
Finally, you need to confirm that Python is installed correctly. This ensures everything is working before you start using it.
- Open the Terminal app
- Type:
python3 --versionand press Enter - Check if the version number is displayed
- Optionally run
python3to test interactive mode
Quick Checks to Verify that Your Python is Actually Working
After following the best way to install Python on Mac, it is important to confirm that it is working correctly. This ensures your system is properly set up for running Python programs and packages.
This step confirms if Python and its package manager are installed and functioning properly on your system. It ensures your installation is complete and ready for coding tasks.
- Check Python version using: python3 –version
- Run a simple test command to confirm Python executes correctly
- Verify pip installation using: pip3 –version
- If errors appear, check the system PATH or reinstall Python
- Ensure Terminal is using the correct Python version
Common Issues and Troubleshooting in Installing Python on Mac
Even after installation, some users encounter errors due to misconfigured paths, multiple Python versions, or missing system tools.
Proper troubleshooting ensures Python runs smoothly and prevents repeated installation issues. Below are the most frequent issues and quick fixes to help you get Python working without confusion.
| Common Issue | What It Means | Quick Fix |
|---|---|---|
| Python command not found | Terminal cannot detect Python installation | Check the installation path or reinstall Python from the official source |
| The wrong Python version opens | macOS is using an older pre-installed Python | Update PATH to point to the latest Python version |
| pip not working | Package manager not recognized | Reinstall pip or ensure Python was installed correctly |
| Permission denied error | System blocks installation or execution | Use admin access or adjust file permissions |
| Homebrew Python conflict | Multiple Python installs causing clashes | Unlink old versions and set the correct PATH |
| SSL certificate error | Secure connections failing during installs | Run the Install Certificates command for Python |
| Command line tools missing | Required build tools are not installed | Install Xcode Command Line Tools |
| Python is installed but not launching | Installation incomplete or broken link | Reinstall Python and verify the installation path |
| Virtual environment not activating | venv setup issue or wrong shell config | Recreate venv and check shell configuration |
| PATH not updated | Terminal doesn’t recognize Python globally | Add Python path to .zshrc or .bash_profile |
Final Thoughts
By now, installing Python on Mac should feel a lot less confusing and way more under your control. With a few simple checks and a clean install, things usually start falling into place without much effort.
Once the right version is set up, most of it just works in the background while you move ahead with your tasks. And if something feels off, it’s rarely a big deal; a quick check or reinstall usually gets things back on track.
From here, it’s all about exploring, trying things out, and letting Python actually start doing its job for you.
Frequently Asked Questions
Which Python Version Should I Install?
You Should Always Install the Latest Stable Python 3 Version for Best Compatibility.
Can I Install Multiple Python Versions on Mac?
Yes, Tools Like Pyenv Allow Multiple Versions to Run on The Same System.
Do I Need Homebrew to Install Python?
No, but It Makes Installation and Updates Easier for Most Users.