



I brokemy first Apple Watch band by yanking it sideways instead of straight out. Took me two minutes to fix, but the scratch on the case stuck around for years.
If you’re about to change your Apple Watch band for the first time, that’s the one mistake worth avoiding, and it has nothing to do with strength or technique. Instead, it’s about angle.
I’ve swapped bands on four different Apple Watches since that first one- official bands, third-party ones, the works- and the method barely changes.
This post walks through exactly how to change Apple Watch band without damaging anything, plus what to check afterward so you’re not wearing a band that’s about to fall off.
Check Your Apple Watch Band Compatibility Before Swapping
Changing an official Apple Watch band uses the same tool-free method across Apple Watch models and sizes. You do not need separate instructions for each watch generation, but you do need the correct band size for your case.
Apple Watch bands are grouped by case size, so check your watch model before swapping bands. The table below shows the common case sizes and compatible band groups.
| Apple Watch Model | Case Sizes | Compatible Band Sizes |
|---|---|---|
| Apple Watch Series 3 | 38mm, 42mm | 38mm bands; 42mm bands |
| Apple Watch Series 4, 5, 6, SE (1st gen) | 40mm, 44mm | 38mm/40mm/41mm bands; 42mm/44mm/45mm bands |
| Apple Watch Series 7, 8, 9 | 41mm, 45mm | 38mm/40mm/41mm bands; 42mm/44mm/45mm bands |
| Apple Watch Series 10 | 42mm, 46mm | 38mm/40mm/41mm bands; 42mm/44mm/45mm/46mm bands |
| Apple Watch Series 11 | 42mm, 46mm | 38mm/40mm/41mm bands; 42mm/44mm/45mm/46mm bands |
| Apple Watch SE (3rd generation) | 40mm, 44mm | 38mm/40mm/41mm bands; 42mm/44mm/45mm bands |
| Apple Watch Ultra, Ultra 2, Ultra 3 | 49mm | 44mm/45mm/46mm/49mm compatible bands |
All you need to change the band is the watch itself. Third-party bands with metal adapters are the exception: those sometimes rely on traditional spring bars, which means keeping a small spring bar tool on hand.
How to Change an Apple Watch Band, Step by Step
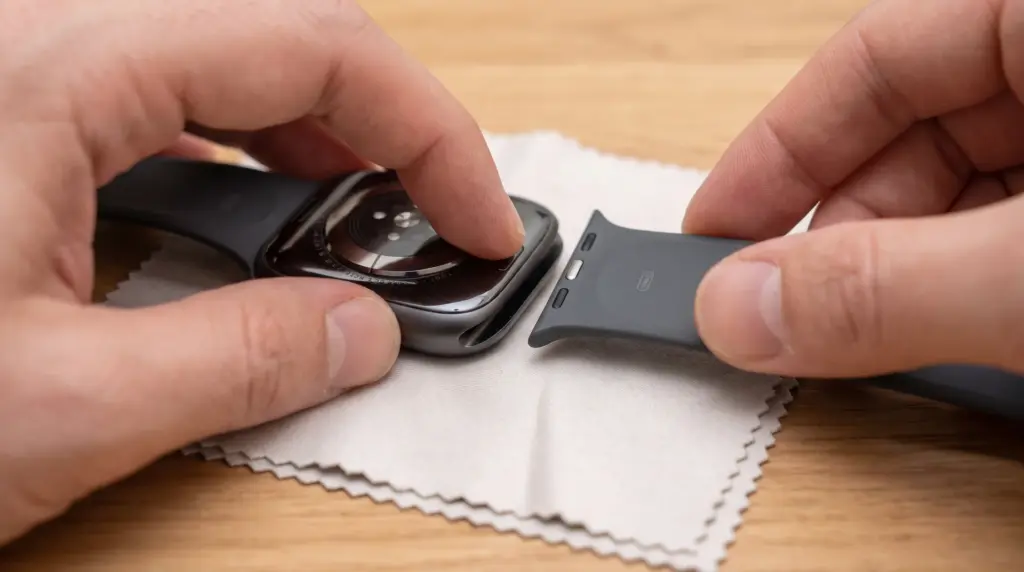
Most Apple Watch bands use the same press-and-slide method for removal and attachment.
Removing Your Old Apple Watch Band
Before you start, place your Apple Watch face-down on a soft surface like a folded towel or microfiber cloth. This keeps it stable and helps prevent scratches on the case.
Look at the back of the watch case where the band connects. You will see a small button near each band slot. This is the release button that unlocks the band.
Press and hold the button, then slide the band sideways out of the slot. You do not need to pull it upward or use force. The band should slide out once the lock is released.
If the band feels stuck, do not force it. Press the release button again and make sure you are sliding the band in the right direction. Forcing it can damage the band connector or the small locking parts inside.
Installing Your New Apple Watch Band
Before putting on the new band, check which side goes where. Most Apple Watch bands have a top and bottom side, and putting one in backward means you will have to remove it and start again.
Line up the connector on the band with the empty slot on the watch case. Slide it in gently until it moves into place. You do not need to press the release button when attaching the band. That button is only used to remove it.
Keep sliding until you feel and hear a click. That means the band has locked into the case properly. Repeat the same steps with the other side of the band
A light tug test is the fastest way to confirm a band clicked into place correctly, on any Apple Watch model. Grip the band near the connector and pull gently away from the case.
It shouldn’t move at all. Any shift, even a small one, means it didn’t fully seat, and you should push it back in until you feel that click rather than heading out the door with it half-attached.
Changing Link Bracelet and Milanese Loop Bands
Link Bracelet and Milanese Loop bands don’t follow the standard press-and-slide method. Each needs an extra release step first, splitting a bracelet link or fully unthreading a magnetic tab before the case’s lugs will let go.
Link Bracelet
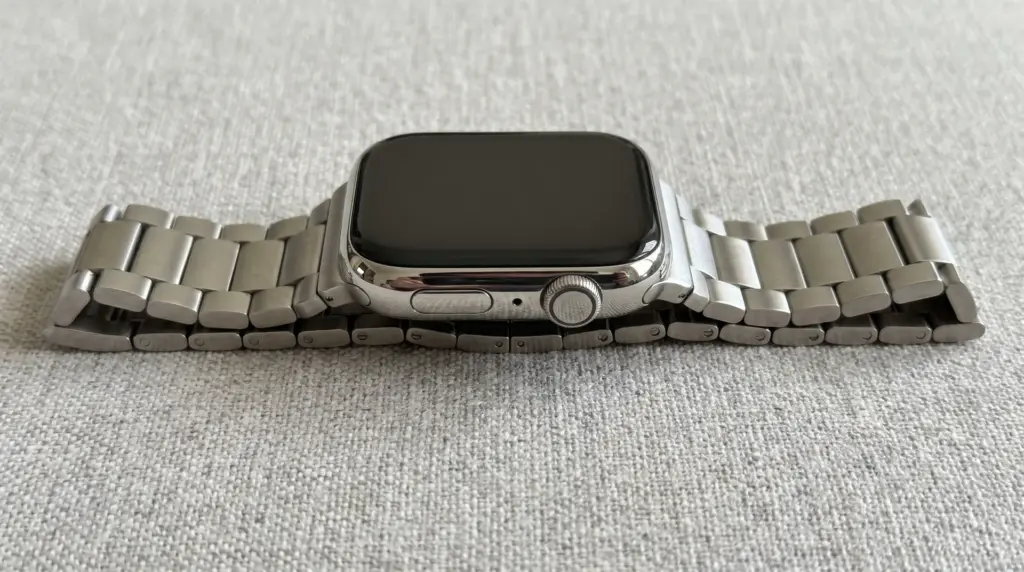
To remove a Link Bracelet, locate the small button or clasp built into the link and press it to open the bracelet section. Once the link separates, create enough slack in the band and gently slide it away from the lugs.
After opening the link, hold the bracelet close to the connection point and guide it out of the case instead of pulling from a distance. This gives you better control over the removal process and helps the bracelet come away smoothly.
Milanese Loop
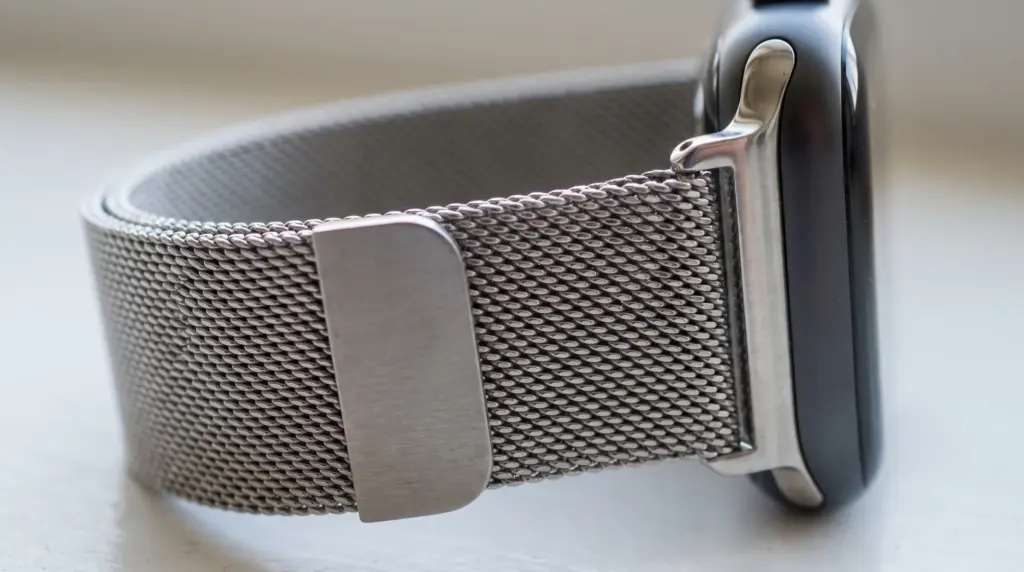
To remove a Milanese Loop band, first pull the magnetic tab completely back through the slot until it is fully clear of the mesh opening. Once the tab is free, press the case’s oval button and slide the band out of the lugs.
Make sure the magnetic end moves smoothly before trying to release the band from the case. If the tab is still caught in the slot, the mesh can bunch up, or the sliding mechanism may not move properly.
Fixing an Apple Watch Band That Won’t Release or Lock
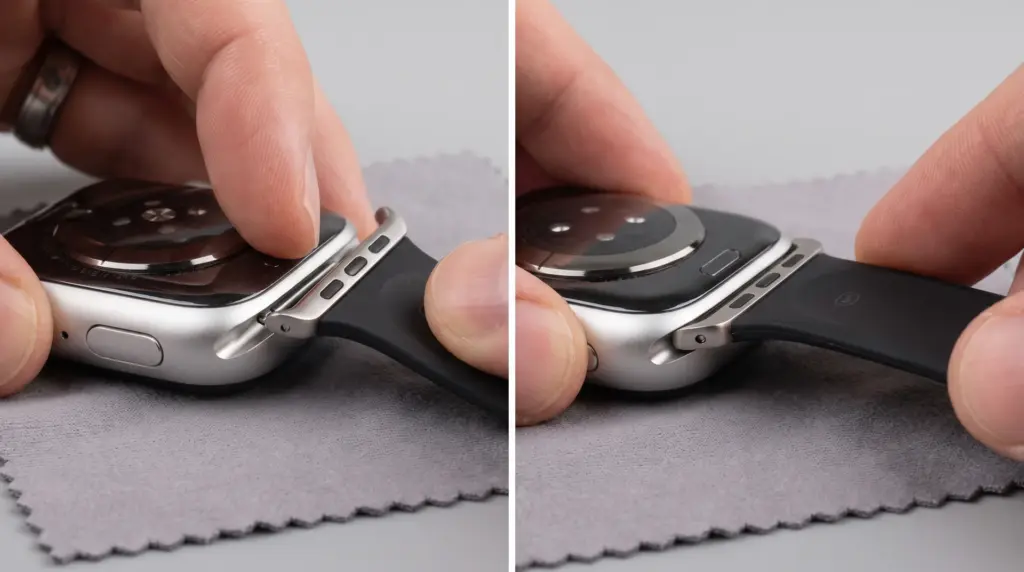
- Check the band position first: If an Apple Watch band will not move or click into place, it is usually an alignment issue rather than a damaged band or incorrect fit.
- Understand how the release works: The release button pulls back a small spring-loaded pin inside the connector. The pin only clears the case when the band slides straight across, parallel to the watch.
- Avoid forcing the band: If the band is slightly angled, the pin can catch on the edge of the slot. Pushing harder can bend the pin or scratch the watch case.
- Realign and try again: Press and hold the release button, straighten the band, and slide it sideways gently until it moves into place.
- Check your band type: Not every Apple Watch band uses the same attachment system. Link Bracelet and some Solo Loop bands work differently, so the release button may not respond the same way.
- A different mechanism does not mean a problem: If the button does nothing, it does not necessarily mean the watch or band is faulty. It may simply use a different attachment design.
Taking a few seconds to identify the band type and connection style can save you from unnecessary troubleshooting or replacing a band that is working normally.
Conclusion
Understanding how to change an Apple Watch band comes down to one motion: straight out, straight in, no forcing.
Once you know that the button just retracts a pin, and that Link Bracelet or Solo Loop bands skip it entirely, the whole process stops feeling fragile. Add the tug test at the end, and you’ve got a way to check your work every single time, not just hope it’s fine.
That’s really what this came down to for me too: not a lack of skill, just not knowing what was actually happening under the button.
Now that you can change Apple Watch band styles without a second thought, take a look at what fits your case size before you buy.
Frequently Asked Questions
Does the band-changing method differ between Apple Watch models?
No. The release button and slide mechanism are the same across all Apple Watch case sizes and generations, including Ultra. The only differences come from band type, not watch model Link Bracelet and some Solo Loop styles use a different release method than the standard button-and-slide.
Where is the Apple Watch band release button?
It’s on the back of the watch, near the edge where the band connects to the case, on both sides. Pressing and holding it releases the spring bar underneath so the band slides free. This location is identical across every Apple Watch model and size.
Why won’t my Apple Watch band come off, and could I damage it trying?
Usually it’s a pressure-angle issue, not a broken watch. Forcing a band that’s stuck at an angle can bend the internal pin or scratch the case. Hold the button fully down and slide evenly and straight; if your band has no button, it likely uses a different release method entirely.
How do I know a new band is properly and safely attached?
After sliding the new band in, you should feel and hear a distinct click. Gently tug the band away from the case if it holds firm without shifting, it’s locked in correctly. If it moves, remove it and slide it back in until it clicks fully.