

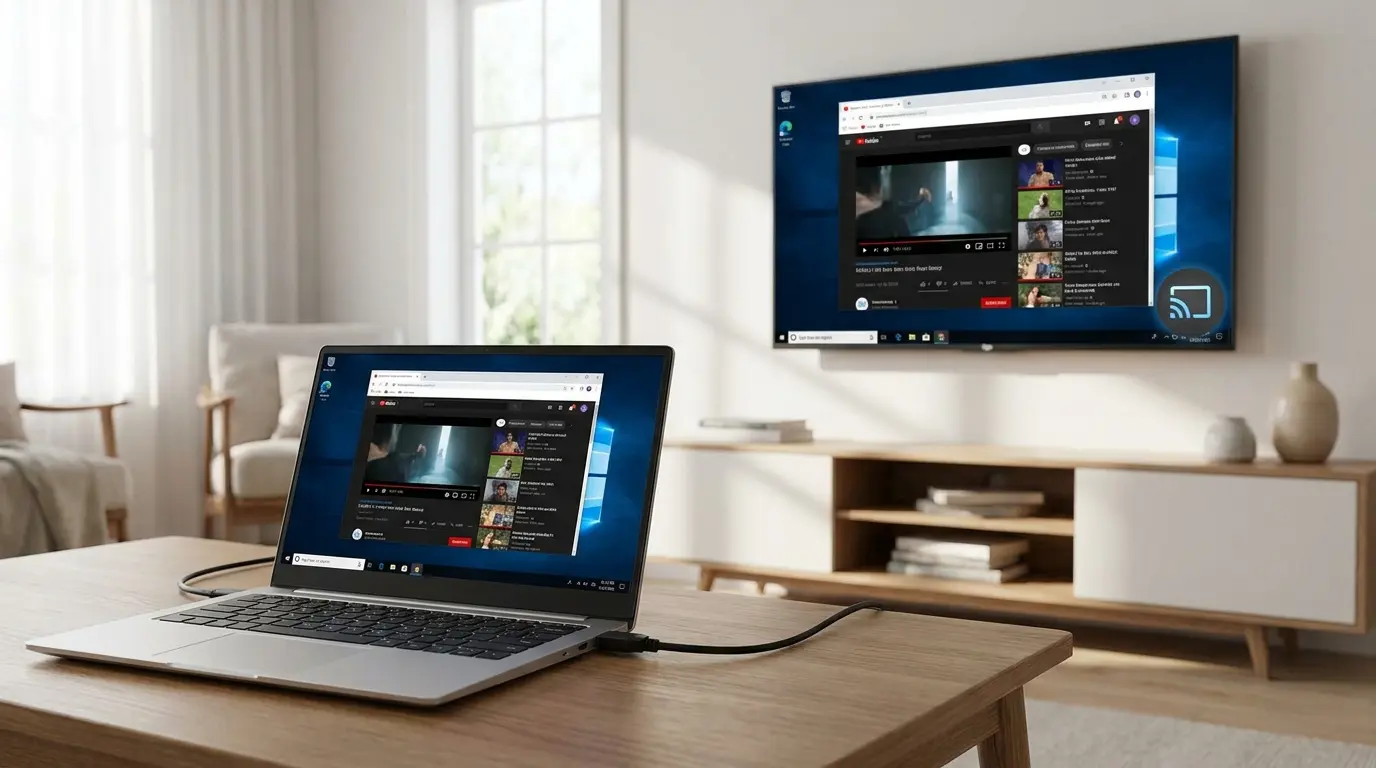
If you are wondering how to connect laptop to TV, the process is usually easier than it sounds. You can use a wired connection for reliable video and audio or connect wirelessly when your devices support screen casting.
I normally start by checking the ports and wireless features on both devices. That quickly tells me which connection method makes sense.
HDMI is usually the simplest wired option, while Miracast works well for compatible Windows laptops and TVs. Some laptops may need a USB-C-to-HDMI adapter instead. I also check the display settings afterward so the TV works as a mirrored screen or a separate display.
Before You Connect Your Laptop to a TV
Before connecting anything, check the ports and display features available on your laptop and TV. Most TVs have at least one HDMI input, while many newer laptops use USB-C instead of a full-size HDMI port.
If you are also deciding whether a TV can pull double duty as your everyday display, it helps to understand screen versus TV differences before you build a setup around one or the other.
A USB-C-to-HDMI adapter can work when the laptop’s USB-C connection supports compatible video output. USB-C alone does not automatically mean the port can send a display signal.
For a wireless Windows connection, confirm that both the laptop and TV support Miracast. Microsoft notes that a Miracast adapter connected to the TV’s HDMI port can also provide wireless display support when the TV does not have it built in.
Here is a quick comparison before getting started:
| Connection Method | What You Need | Best For |
|---|---|---|
| HDMI | HDMI cable | Reliable video and audio |
| USB-C to HDMI | Compatible adapter and HDMI cable | Laptops without HDMI |
| Miracast | Compatible Windows laptop and display | Wireless Windows connection |
| AirPlay | Mac and compatible TV or Apple TV | Wireless Mac connection |
HDMI is generally the easiest place to start when both devices already have compatible ports.
How to Connect a Laptop to a TV
There are two easy ways to connect your laptop to a TV: with an HDMI cable for a stable connection or wirelessly with Miracast. Follow the steps below to set up the option that works best for your devices.
Step 1: Check Your Laptop and TV Ports
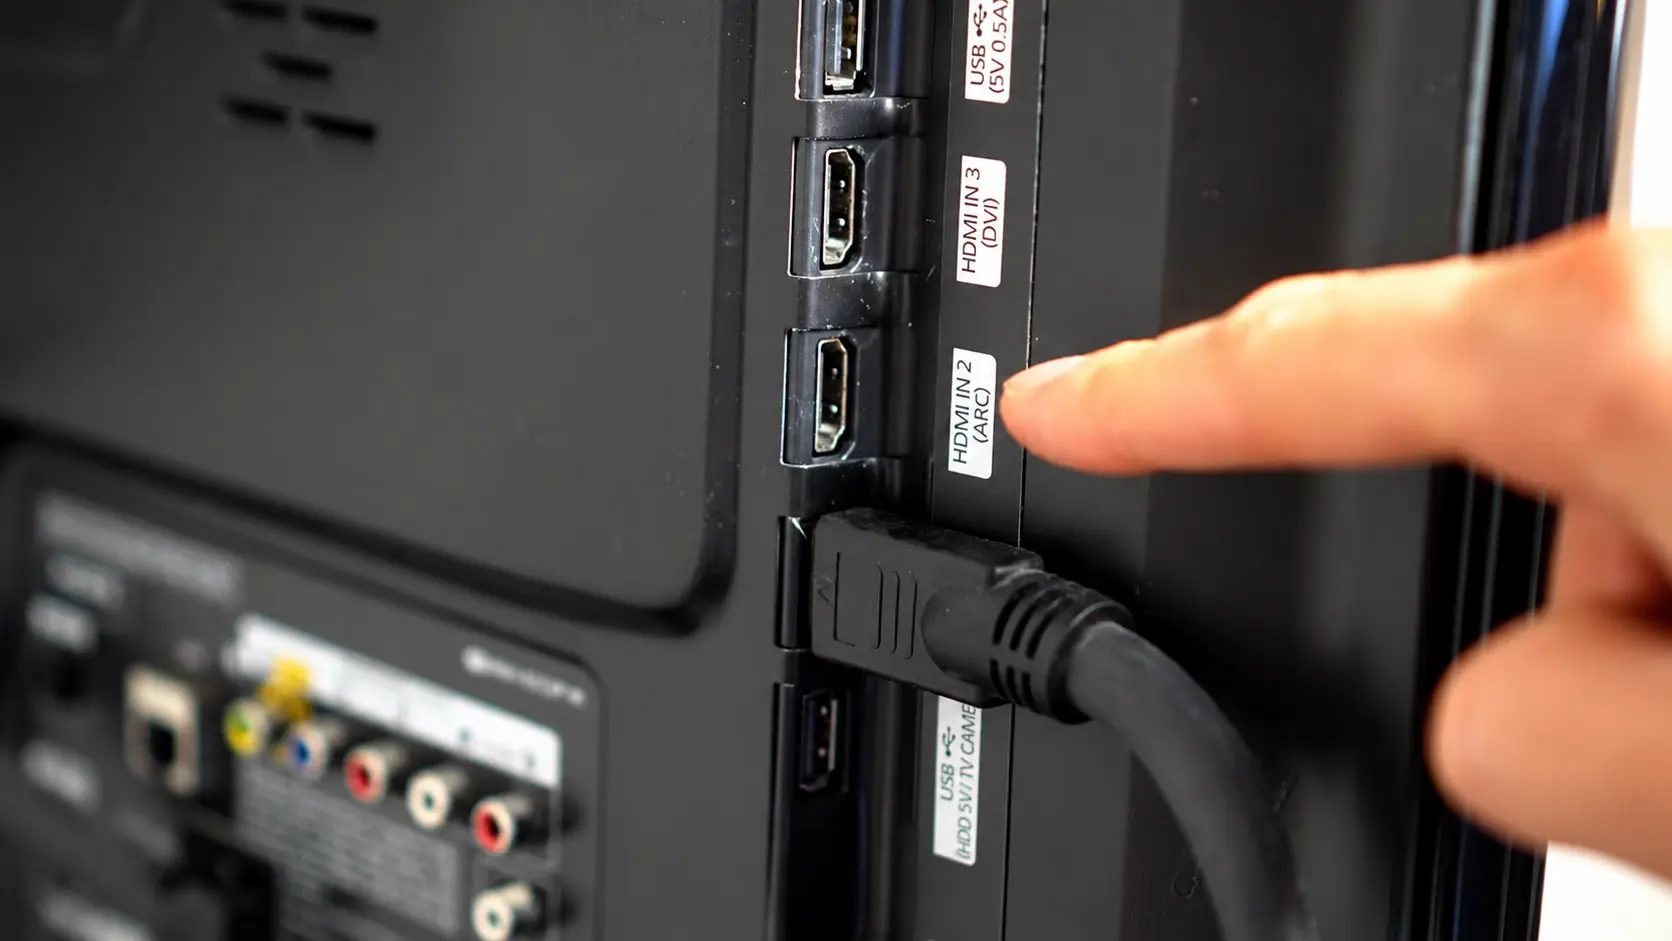
Look at the sides or back of your laptop and find the HDMI port. Then check the back or side panel of your TV for an available HDMI input. The TV ports are usually labeled HDMI 1, HDMI 2, or something similar.
If your laptop does not have a full-size HDMI port and only has USB-C, connect a USB-C to HDMI adapter to the laptop first. Make sure the adapter supports video output before moving to the next step.
If you are already planning to run other accessories off the same port, it is worth looking at USB-C hub picks that handle video output alongside everything else instead of buying a single-purpose adapter.
Step 2: Connect the Laptop to the TV with HDMI
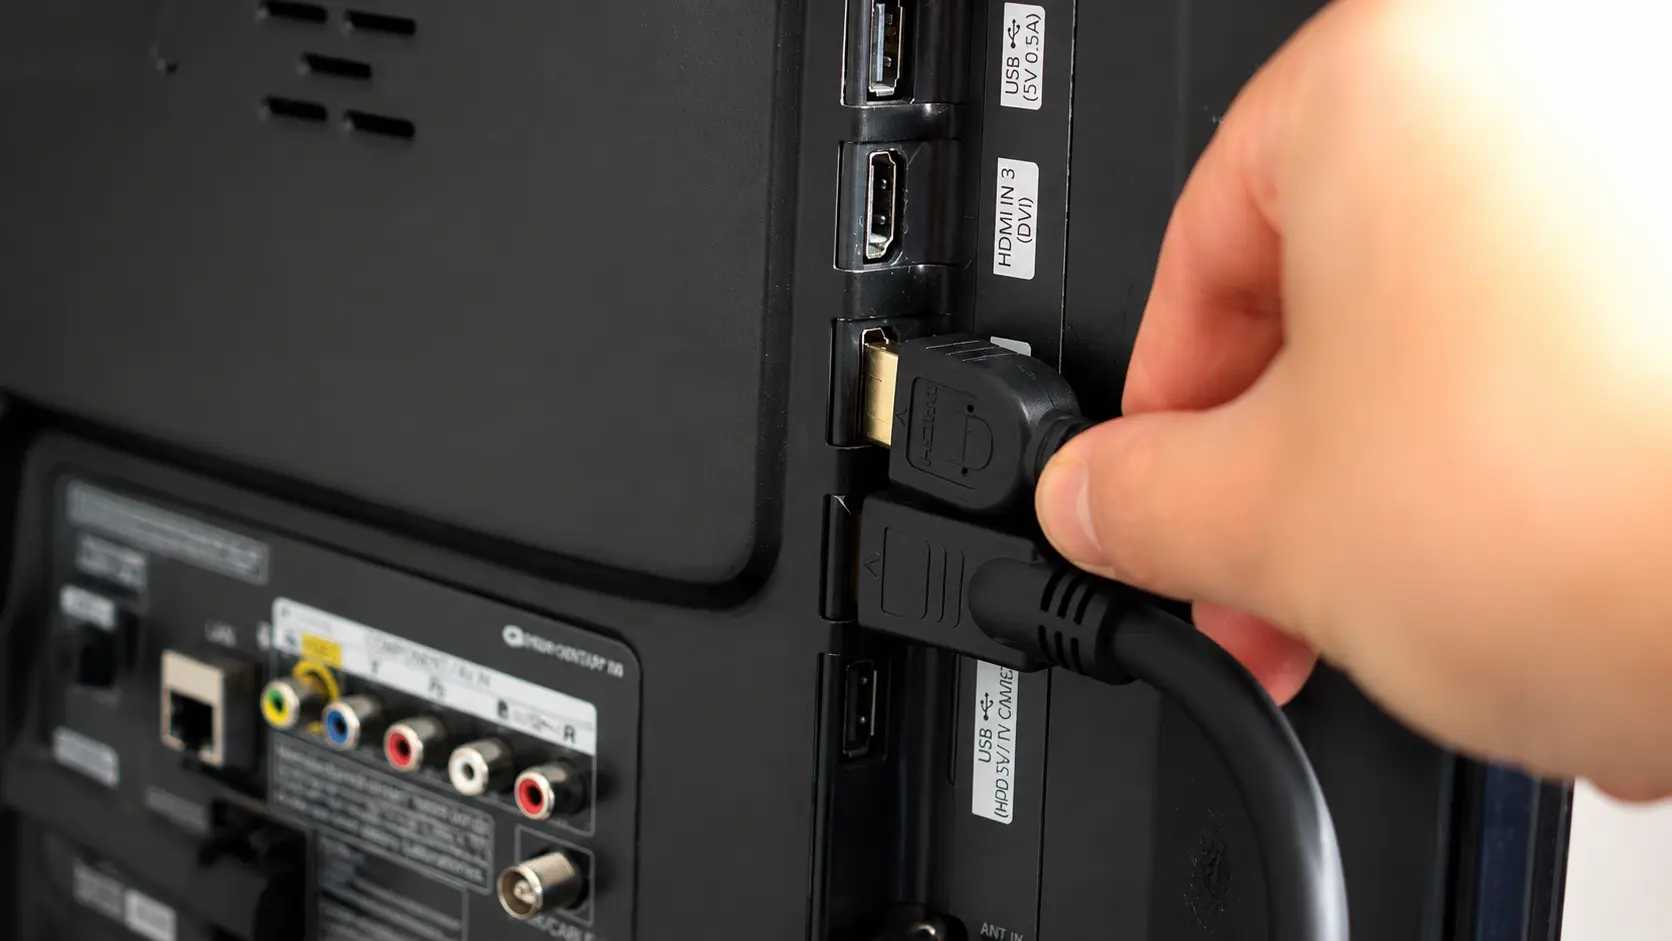
Plug one end of the HDMI cable firmly into your laptop’s HDMI port or USB-C adapter. Connect the other end to an available HDMI port on your TV.
Check the label next to the TV port and remember its number. For example, if you connected the cable to HDMI 2, you will need to select HDMI 2 from the TV’s input menu.
Step 3: Switch the TV to the Correct HDMI Input
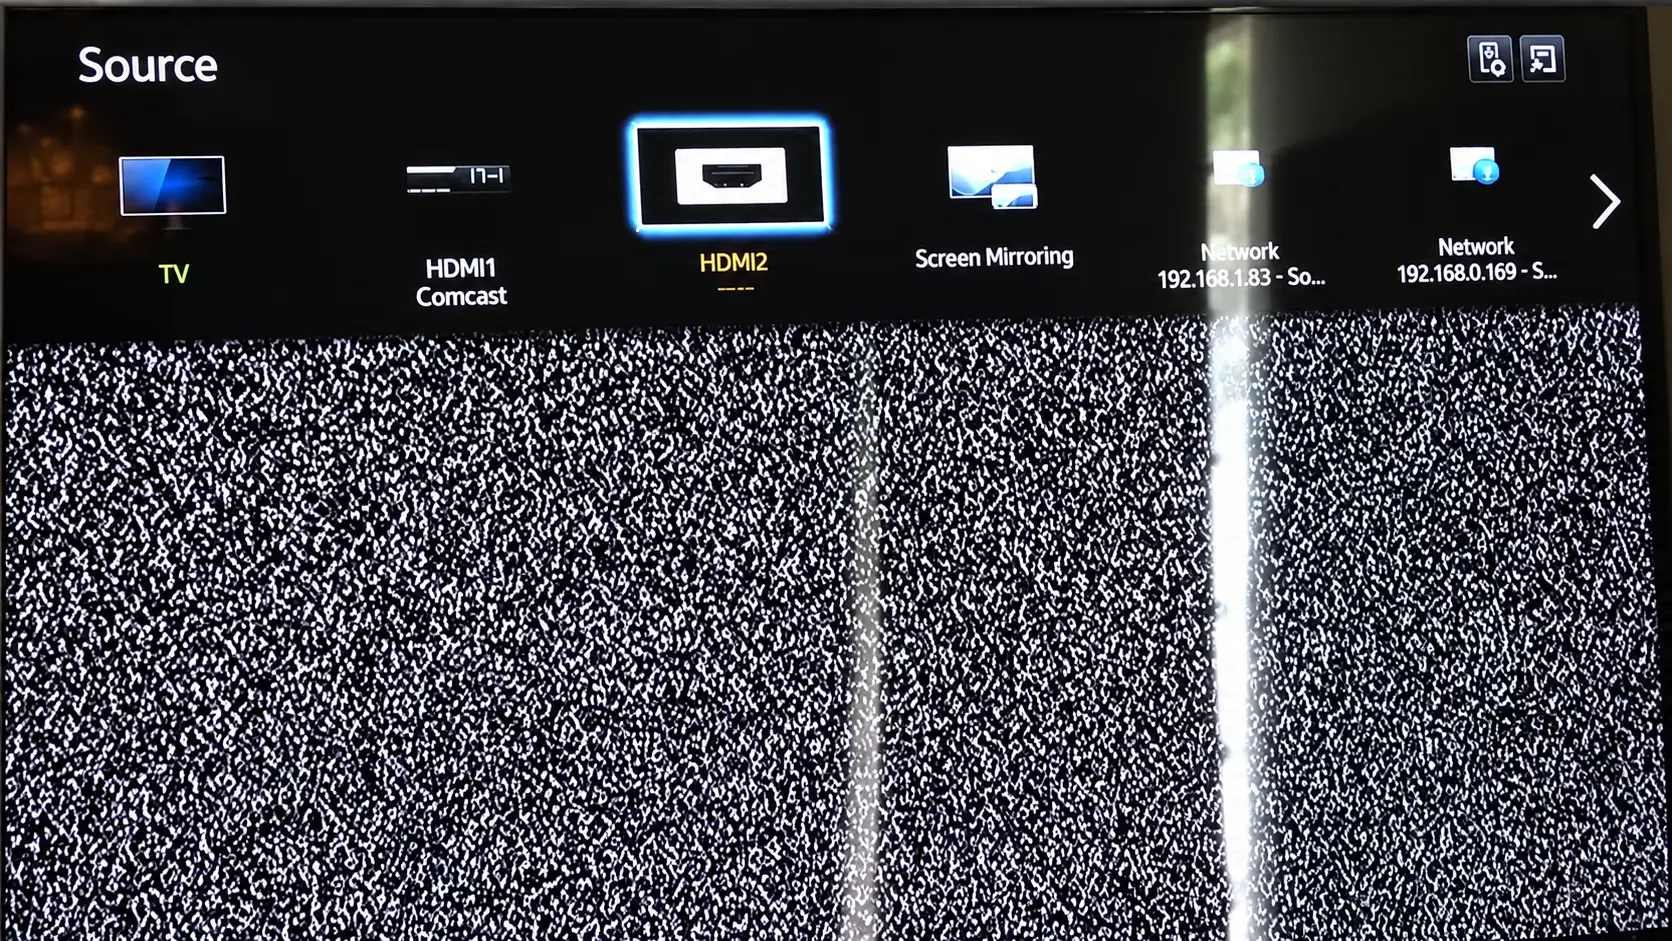
Pick up your TV remote and press the Input or Source button. A list of available inputs should appear on the TV screen.
Select the HDMI input that matches the port you used, such as HDMI 1 or HDMI 2. Wait a few seconds for the connection to load. Your laptop screen should then appear on the TV.
Step 4: Choose How Your Laptop Screen Appears
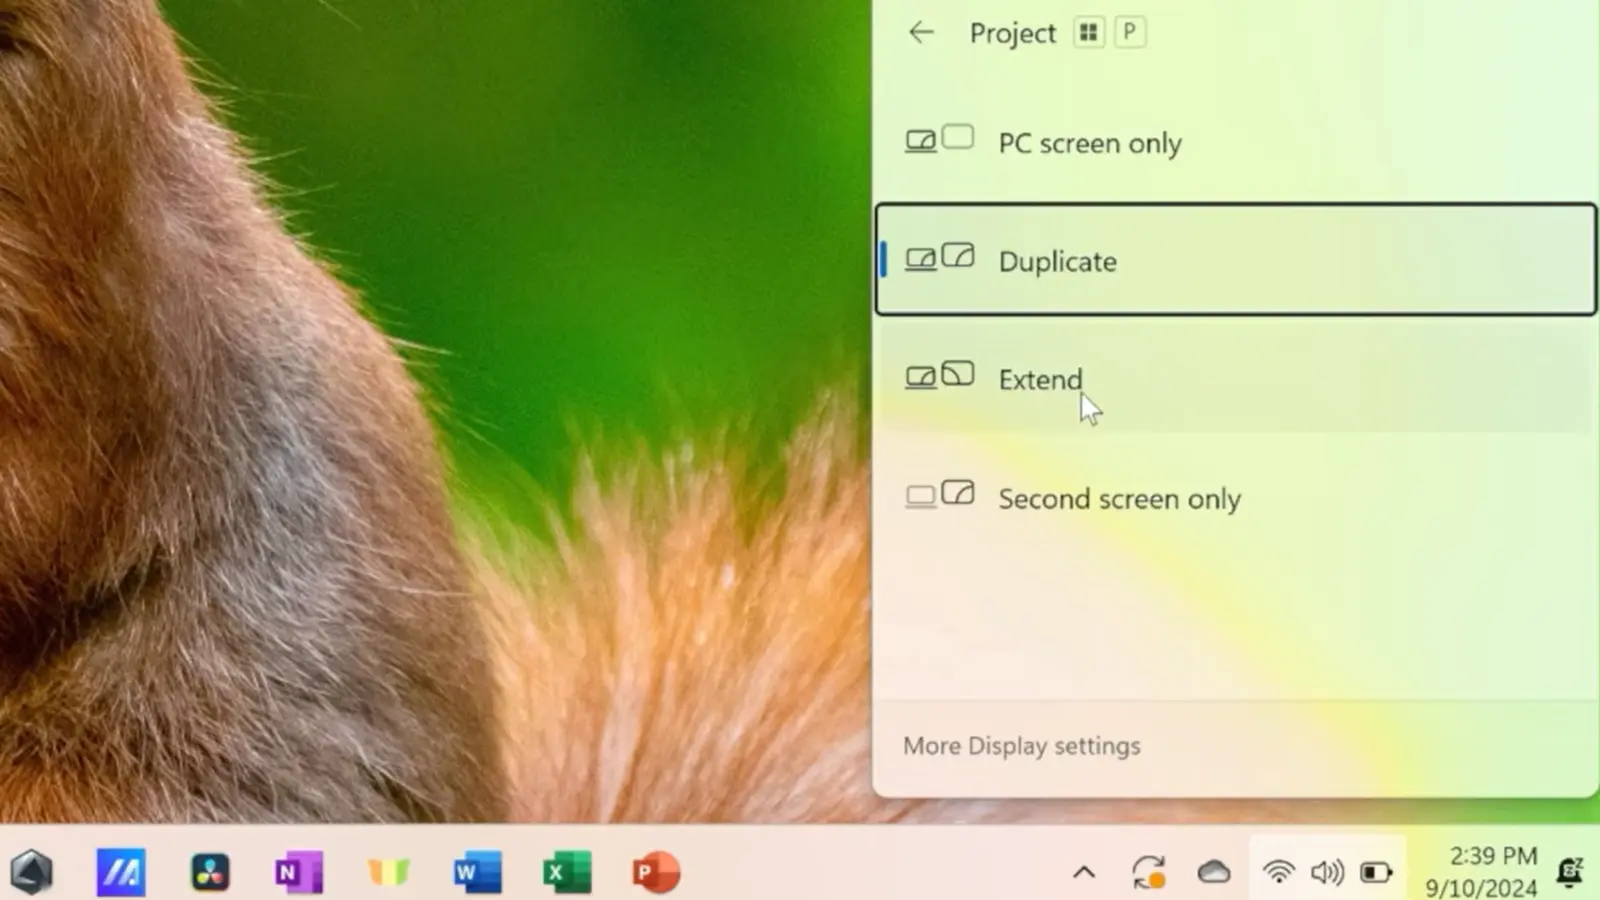
On your Windows laptop, press Windows + P at the same time. A display menu will appear on the side of the screen with several projection options.
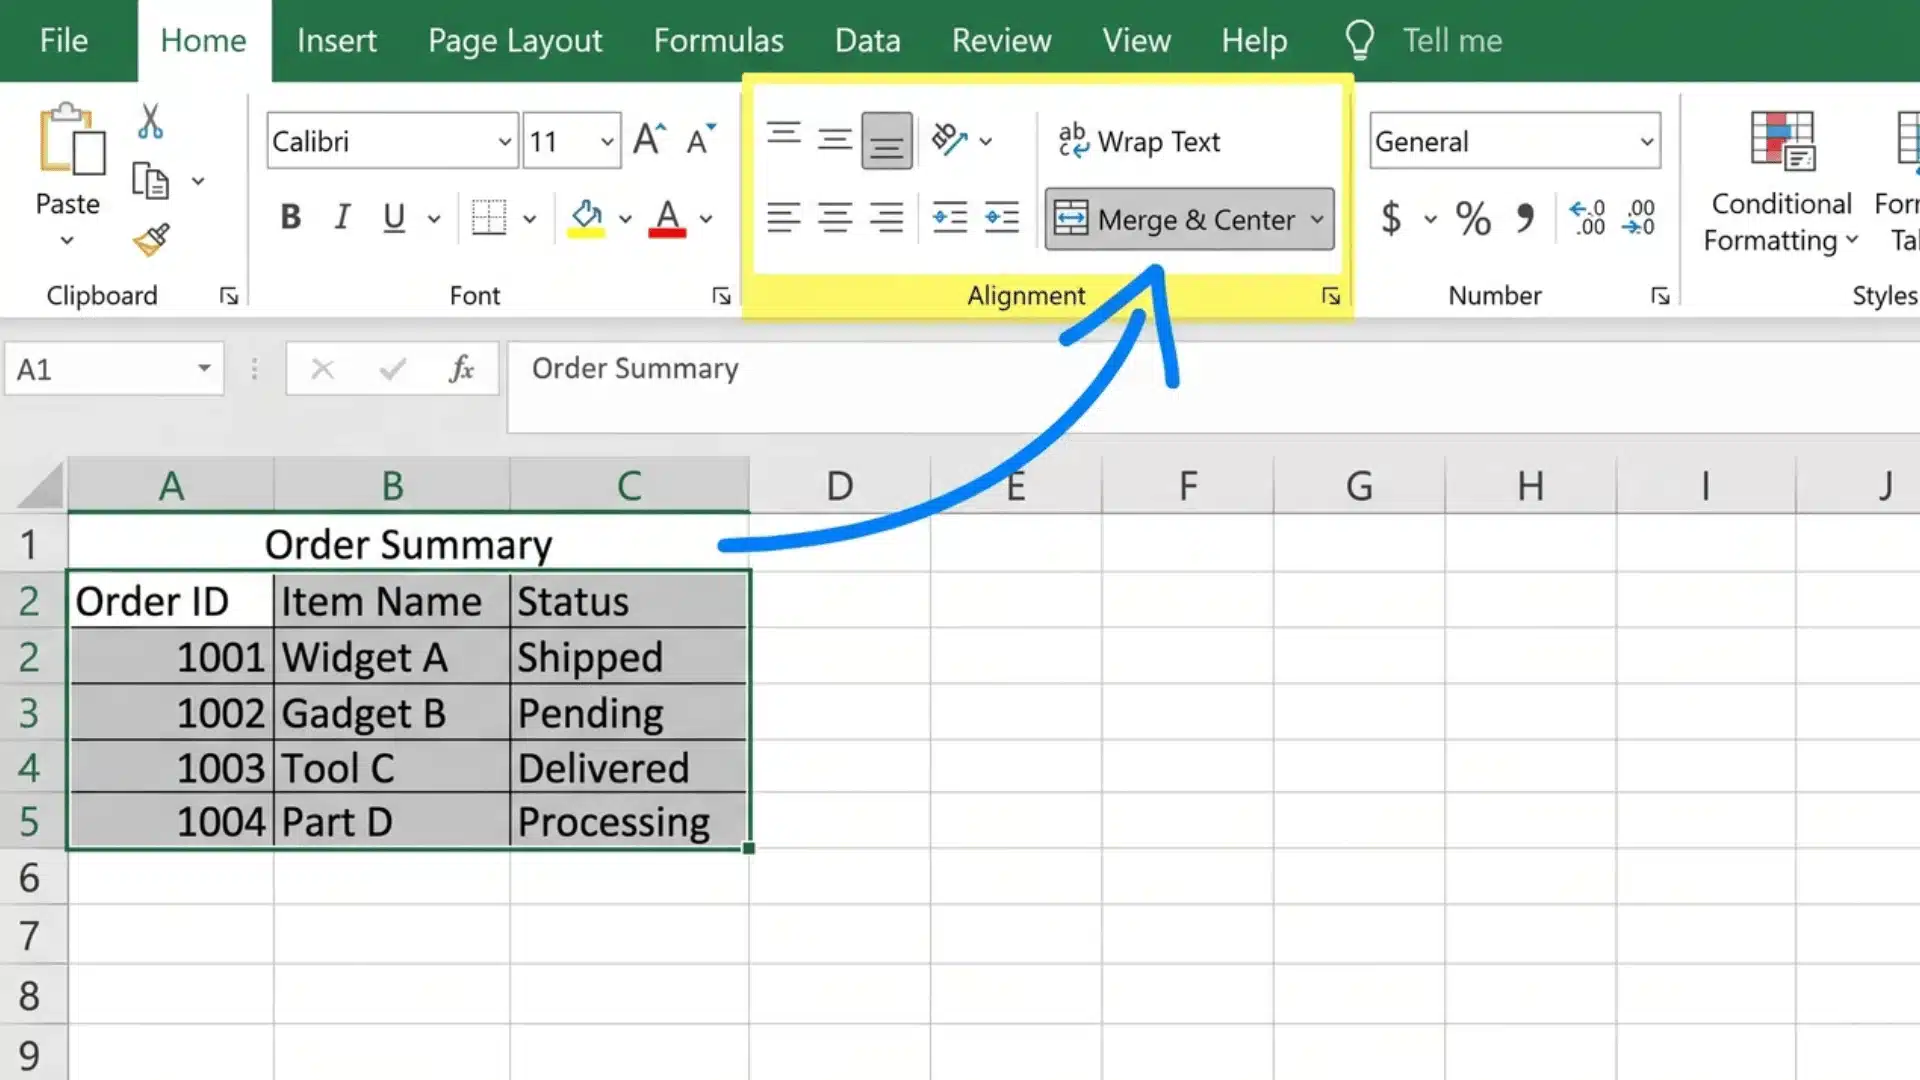
Choose Duplicate if you want the TV to show the same content as your laptop. Select Extend if you want to use the TV as a second display, or choose Second screen only if you want the picture to appear only on the TV.
Step 5: Connect Your Laptop to the TV Wirelessly
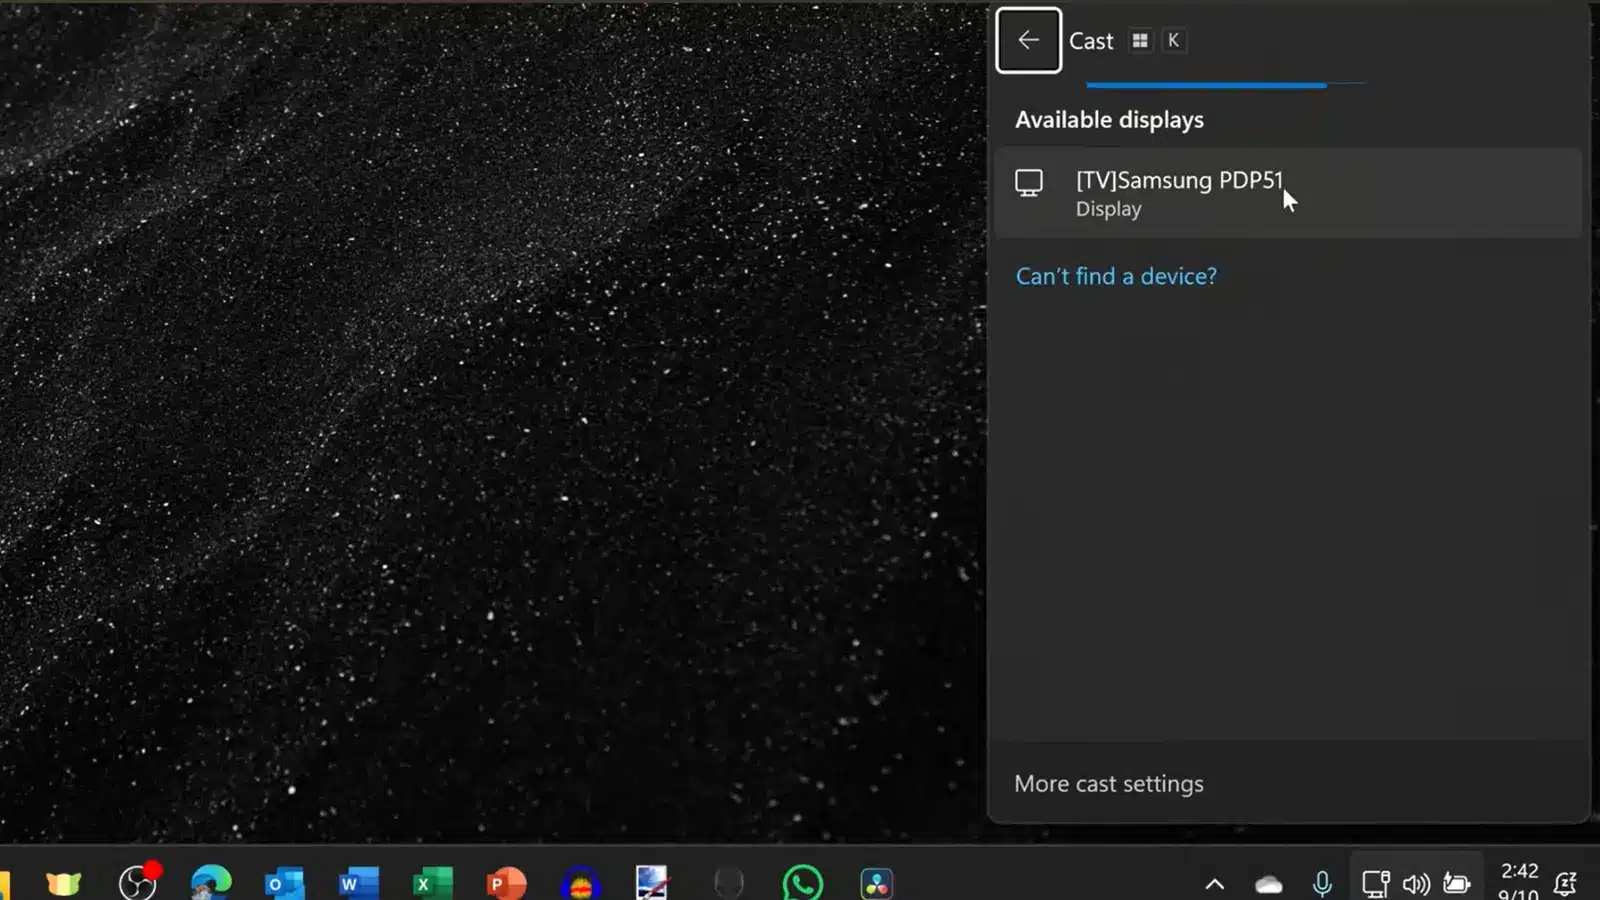
First, check that your TV supports Miracast or a Screen Mirroring feature. Turn on Screen Mirroring from your TV’s Input, Source, or settings menu if required.
On your Windows laptop, press Windows + K to open the available wireless display devices. Find your TV in the list and select it. Follow any connection prompt that appears on your TV or laptop to complete the connection.
Step 6: Set Up the Wireless Display
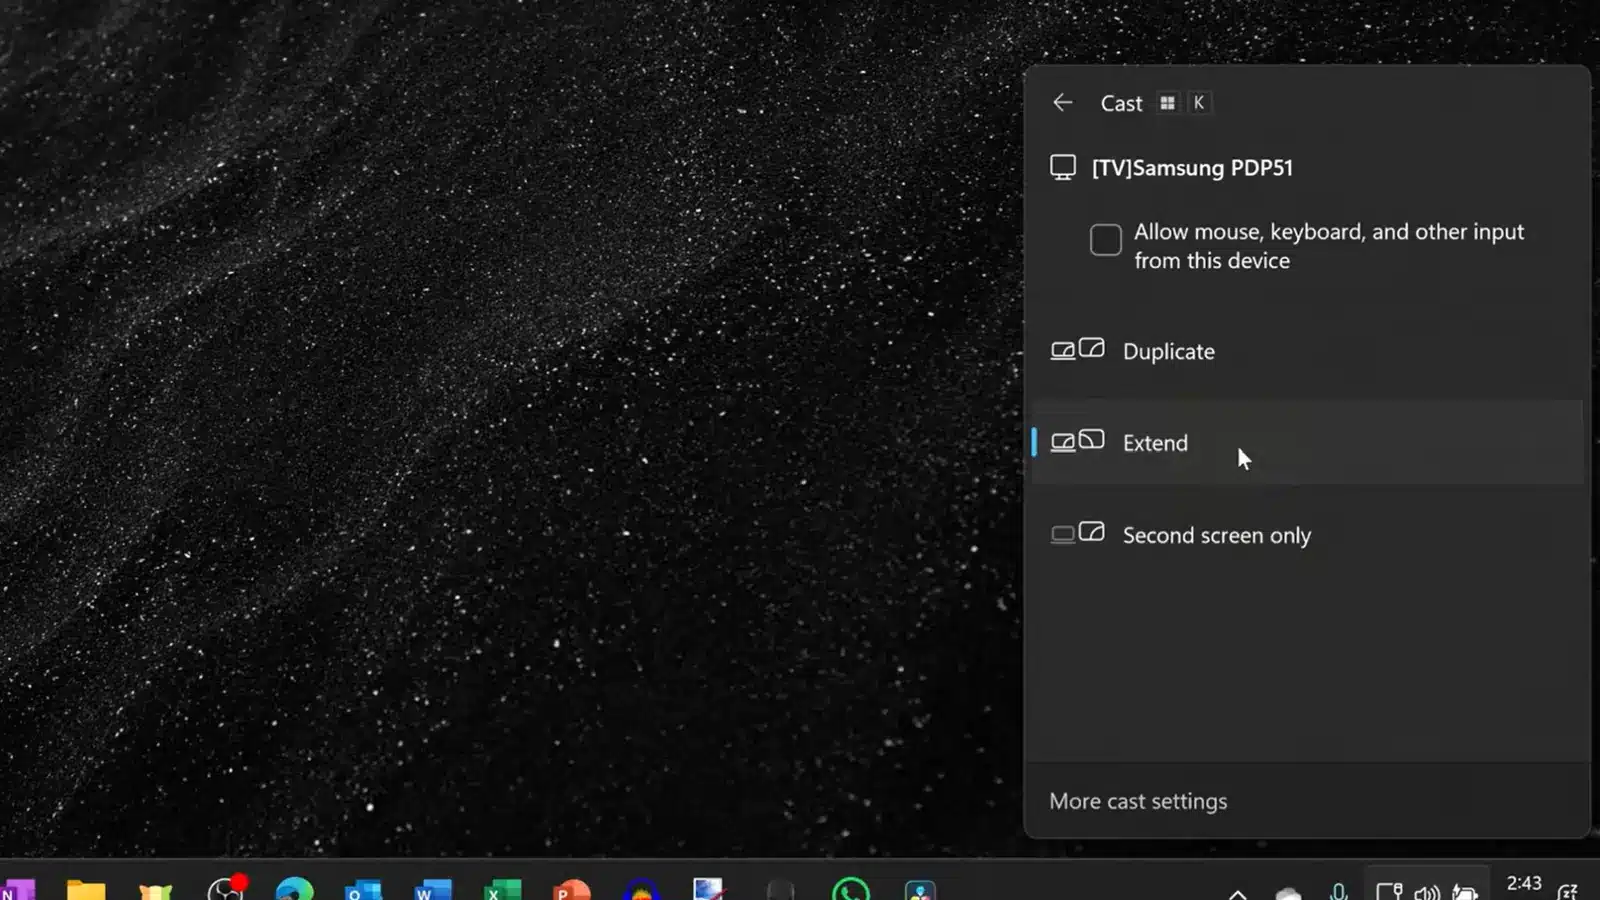
After the wireless connection is established, check that your laptop screen appears correctly on the TV. If the TV does not appear in the Windows + K menu, return to your TV’s Source or Input menu and confirm that Screen Mirroring is enabled.
Once connected, use the Windows display controls to choose how you want to use the TV. You can duplicate your laptop display for presentations or videos, or extend the desktop if you want extra screen space.
For a complete walkthrough of the process, check out the video tutorial below:
How to Use a TV as a Second Monitor for Your Laptop
A TV can also provide extra desktop space instead of simply copying the laptop screen.
On Windows, press Windows + P and select Extend. Windows then treats the laptop and TV as separate displays. Microsoft also provides display controls under Settings > System > Display for arranging multiple screens.
I normally check the screen arrangement after enabling Extend mode so moving the cursor between displays feels natural.
You can also review the resolution, scaling, and text size if content appears too large, too small, or unclear on the TV.
How to Confirm the Connection Is Working Correctly
Once the connection is active, check three things: display quality, sound, and screen mode.
Start by checking that the laptop content fills the TV screen correctly without appearing stretched, cropped, or unusually blurry.
Next, play a short video or audio clip and confirm that sound comes through the intended speakers.
Finally, check the current display mode. Duplicate is useful when both screens need identical content, while Extend is better when you need additional workspace.
I also move a window between the laptop and TV when testing Extend mode because it quickly confirms that both screens are responding correctly.
Why Is My Laptop Not Connecting to My TV?
Connection problems often come from a small number of setup issues. Check the basic connection, input, compatibility, and display settings before changing more advanced options.
- Wrong HDMI Input: Make sure the TV input matches the HDMI port connected to the laptop.
- Loose HDMI Cable: Disconnect and firmly reconnect both ends of the cable. Try another HDMI port if needed.
- Display Not Detected: Open Windows display settings and check for the connected screen. Microsoft also recommends checking projection settings when an external display is not appearing correctly.
- USB-C Adapter Not Working: Confirm that the laptop’s USB-C port supports video output and that the adapter supports the required display connection.
- TV Missing From Windows + K: Confirm that both devices support Miracast and that the TV’s wireless display or screen-mirroring function is active. Microsoft recommends checking Miracast compatibility when a wireless display cannot connect.
- No TV Sound: Open Windows sound settings and select the TV or HDMI connection as the audio output.
- Display Looks Wrong: Review the resolution, scaling, and display mode in Windows settings.
Testing another HDMI cable or TV input can also help identify whether the problem comes from the cable rather than the laptop settings.
HDMI vs Wireless: Which Connection Is Better?
Both methods work well for everyday use, but each suits a different type of setup.
| Feature | HDMI | Wireless |
|---|---|---|
| Cable required | Yes | No |
| Setup | Usually simple | Depends on device support |
| Connection stability | High | Can vary |
| Input delay | Usually lower | Can be higher |
| Presentations | Good | Convenient |
| Movies and streaming | Good | Convenient |
| Gaming | Usually preferable | Less suitable for delay-sensitive gaming |
HDMI makes more sense when reliability and low delay matter. Wireless casting is convenient when you mainly want to share videos, presentations, or basic desktop content without running another cable.
Key Takeaway
Knowing how to connect your laptop to a TV gives you several practical options for videos, presentations, work, and additional screen space.
I usually prefer HDMI when I need a steady connection with minimal setup. Wireless casting makes more sense when keeping the setup cable-free matters more.
Check your laptop ports and TV features first, then choose HDMI, a compatible USB-C adapter, Miracast, or AirPlay. I also recommend checking the display mode and audio output after connecting because those two settings solve many of the small problems that appear during setup.
Frequently Asked Questions
Can I connect my laptop to my TV without HDMI?
Yes. If your laptop lacks an HDMI port, use a USB-C-to-HDMI adapter, or skip cables entirely with a wireless connection – Windows+K or Mac’s Screen Mirroring – as long as both devices share the same Wi-Fi network and the TV supports casting.
Why does my laptop connect to the TV but there’s no sound?
The TV usually isn’t set as the default audio output. Video can pass through HDMI or a wireless connection while your laptop keeps sending sound to its own speakers until you manually select the TV as the output device.
Can I connect my laptop to a TV that isn’t a smart TV?
Yes, but only with a cable. Wireless mirroring requires a smart TV or a connected streaming device with casting support – a standard TV needs an HDMI (or adapter) connection to display your laptop screen.
Should I use Duplicate or Extend mode?
Use Duplicate to mirror the same screen on both displays, useful for presentations or videos. Use Extend to treat the TV as a second monitor with separate content, better for multitasking across two screens.