


Your MacBook always seems to make a sound at the worst possible moment. Right when things are quiet, a notification or call suddenly takes over.
If you’re searching for how to turn the ringer off on a MacBook, you’re probably hoping for a quick fix instead of digging through common MacBook Pro problems.
It usually takes only a few simple changes to reduce those interruptions. Once things are set up, your Mac becomes much easier to work with.
Let’s get straight into it so you can get back to your tasks without constant interruptions.
Can You Mute Your MacBook Without Turning Off All Sounds?
Yes. You don’t have to mute your entire MacBook just to stop unwanted ringing or notification sounds.
macOS lets you silence certain alerts while music, videos, and other audio continue to play normally. That means you can keep using your Mac without missing out on entertainment.
The best option depends on what’s making the sound. In many cases, changing one setting is all you need, rather than muting everything.
This gives you more control over how your MacBook behaves, so it stays quiet when you need it and works normally the rest of the time.
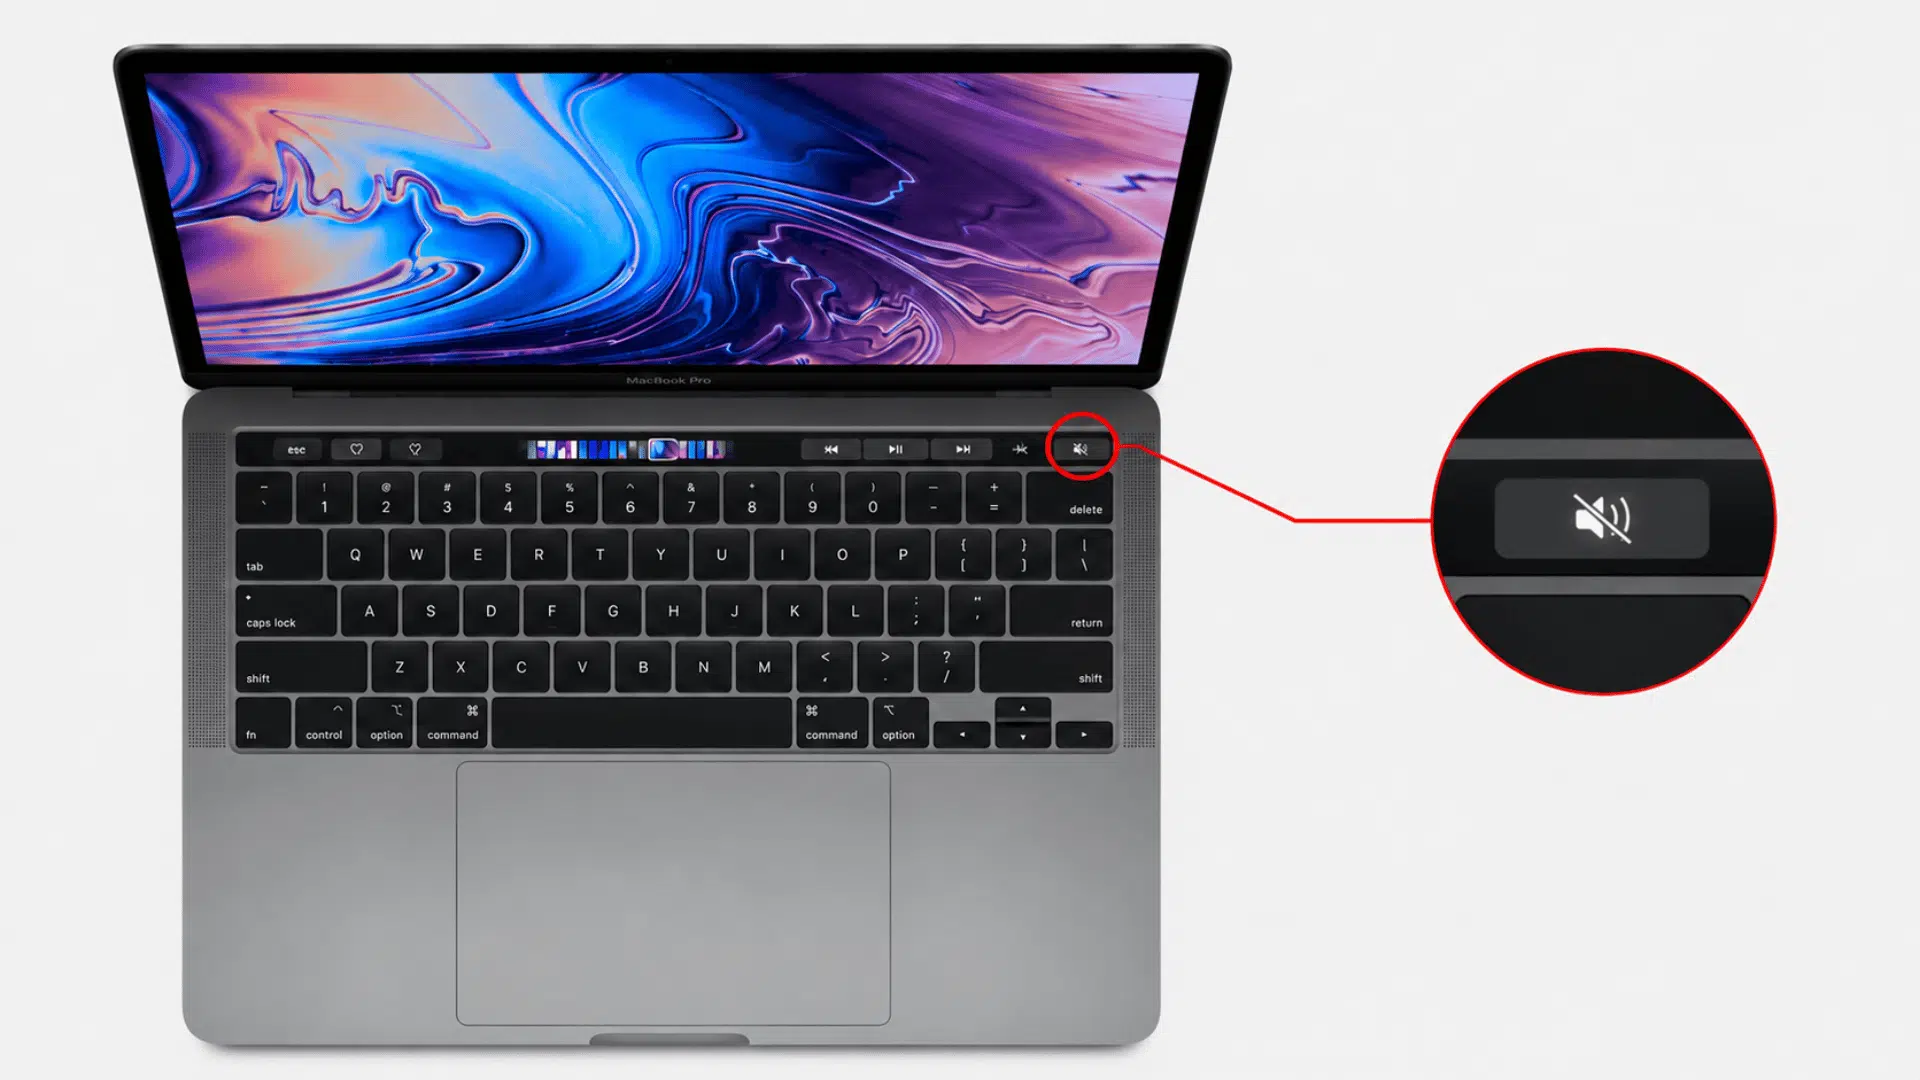
How to Turn Ringer Off on MacBook with Various Methods?
There’s no single button that turns off every sound on a MacBook. The right method depends on what’s causing the ringing, such as notifications, FaceTime calls, or calls forwarded from your iPhone.
Follow the methods below one by one. You can use just the one that matches your situation or combine them if you want your MacBook to stay completely silent:
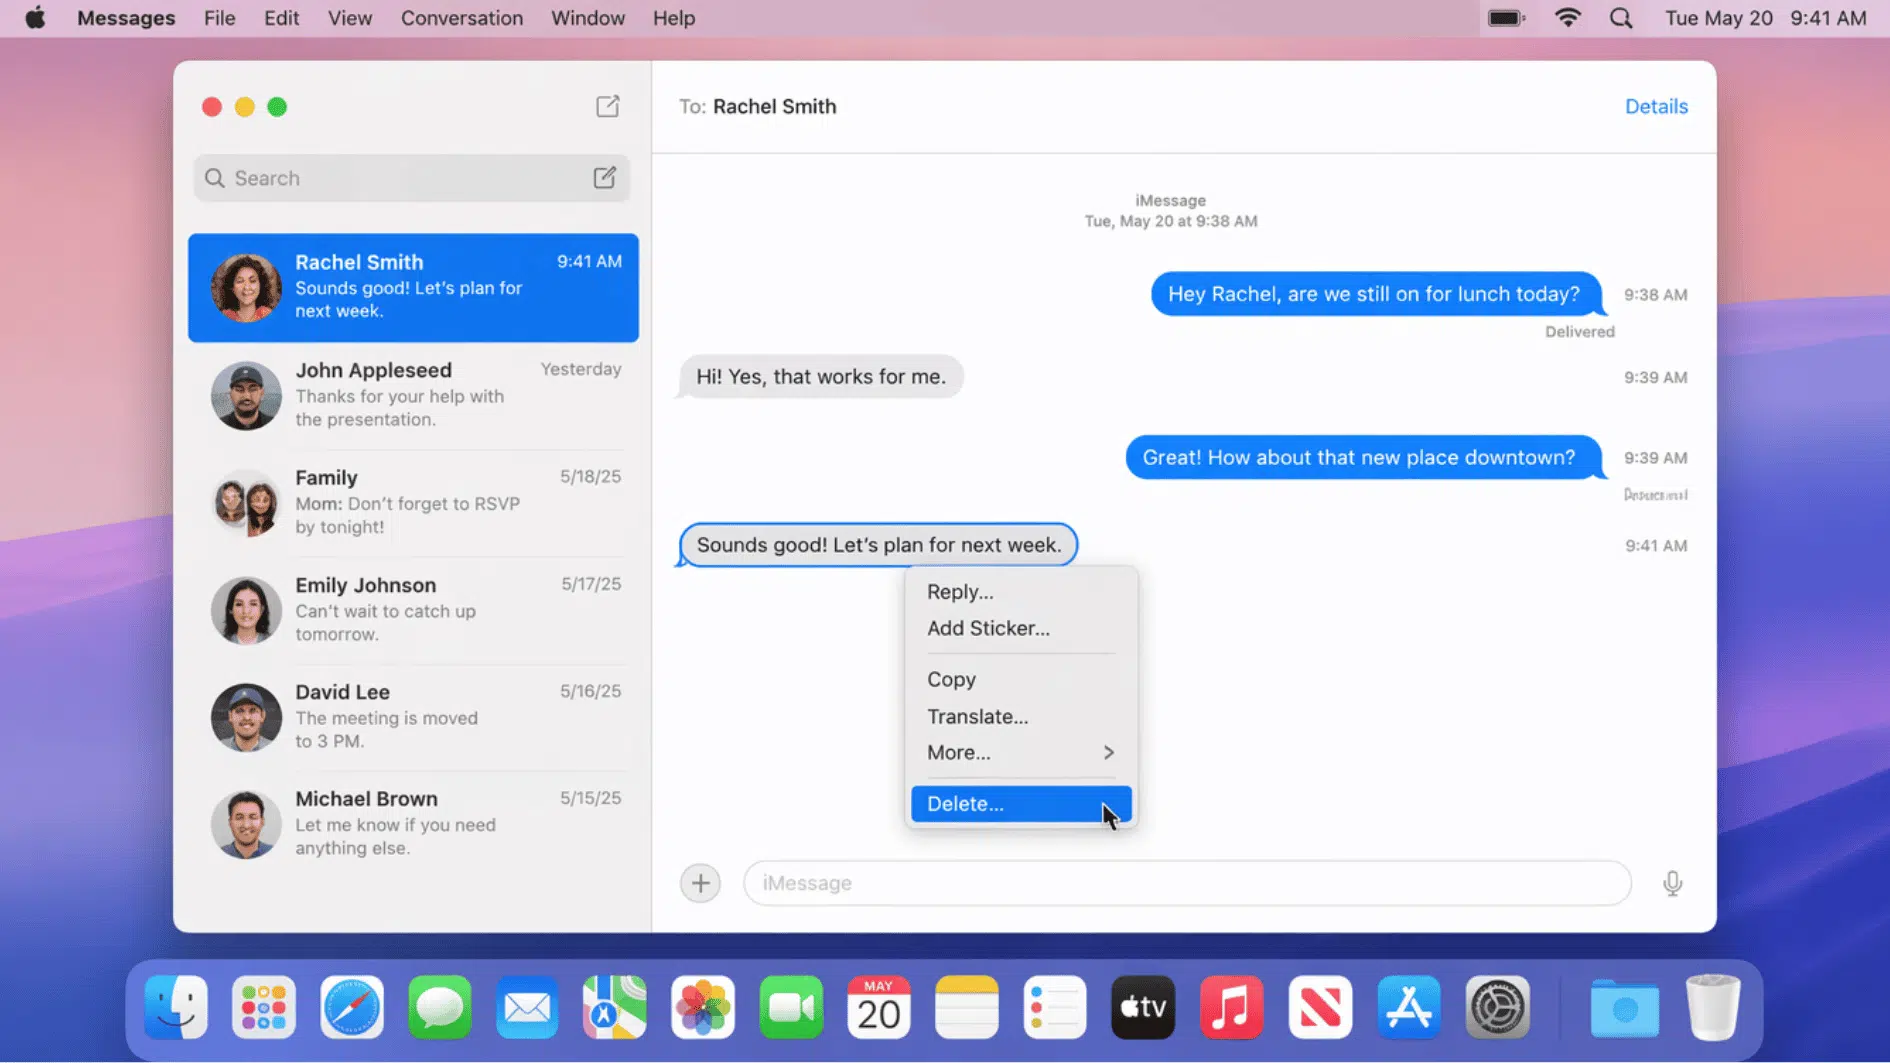
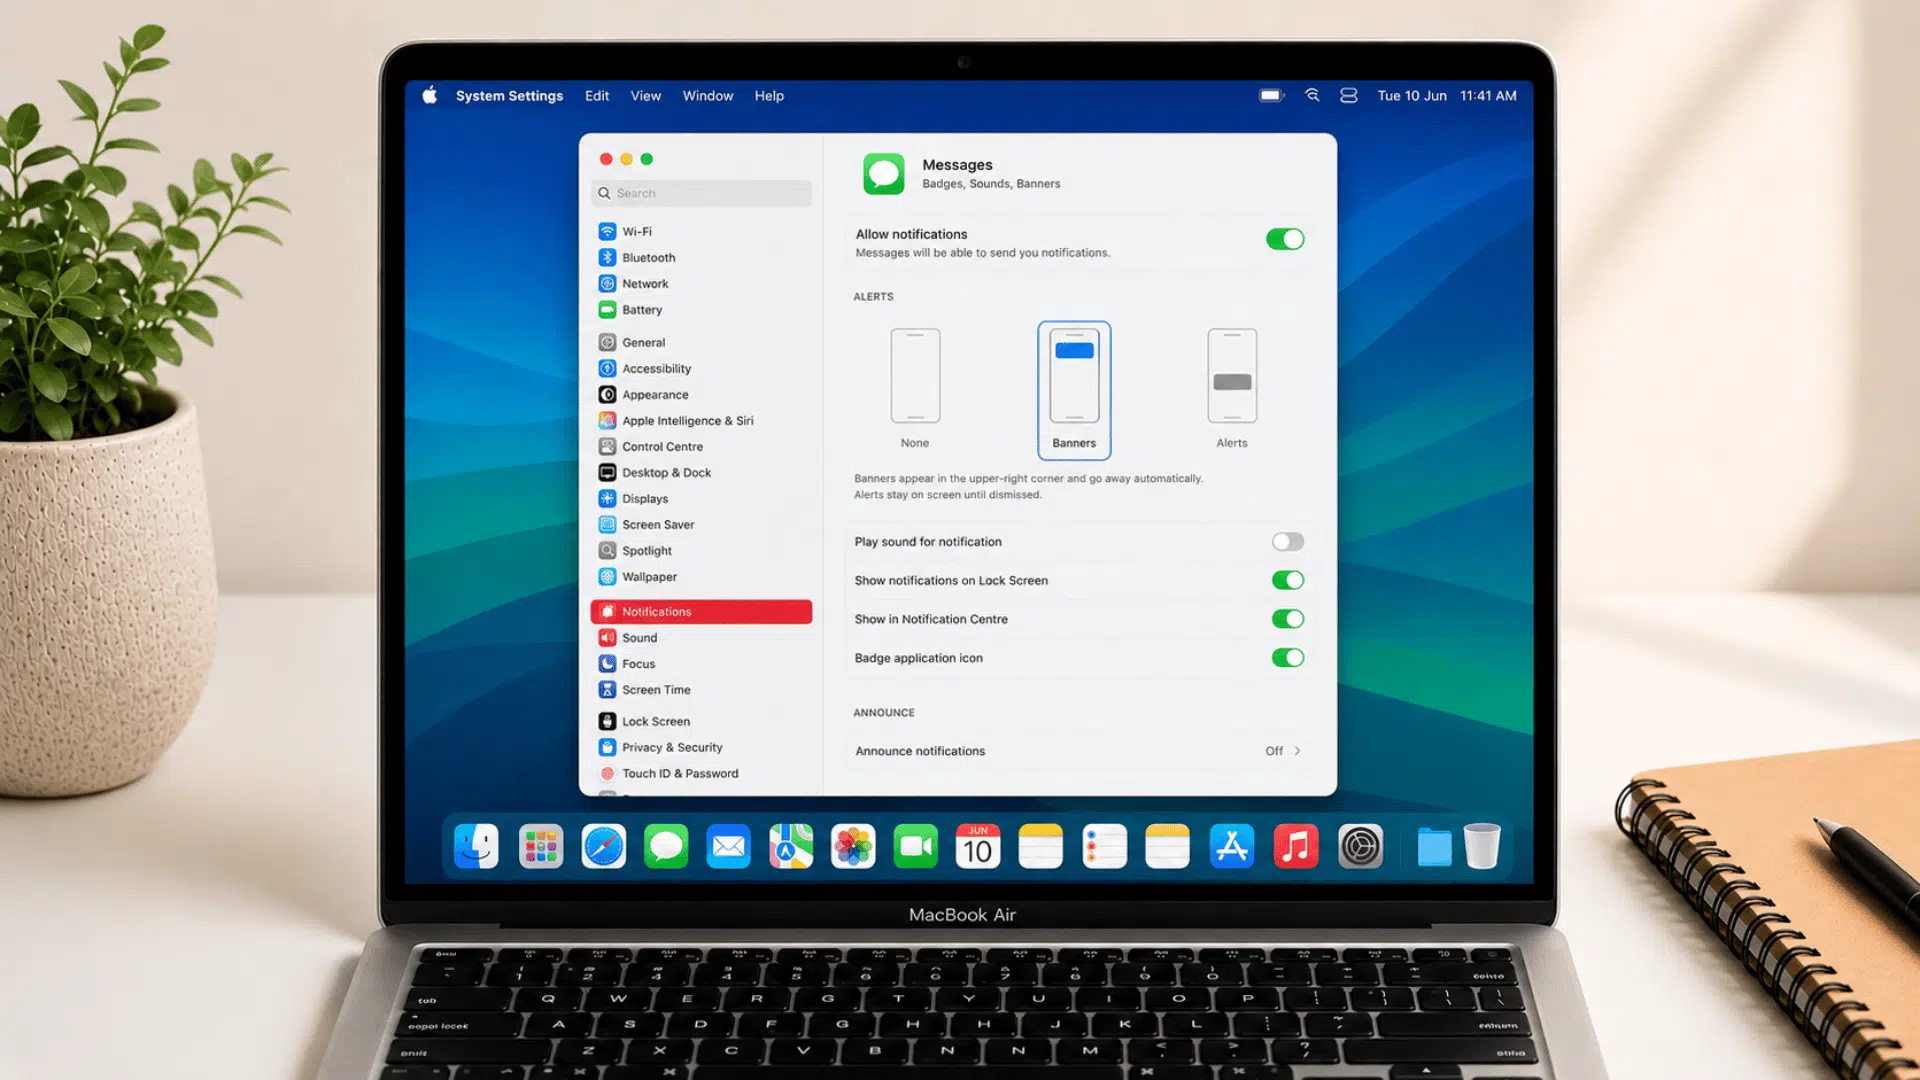
1. Turn Off Notification Sounds
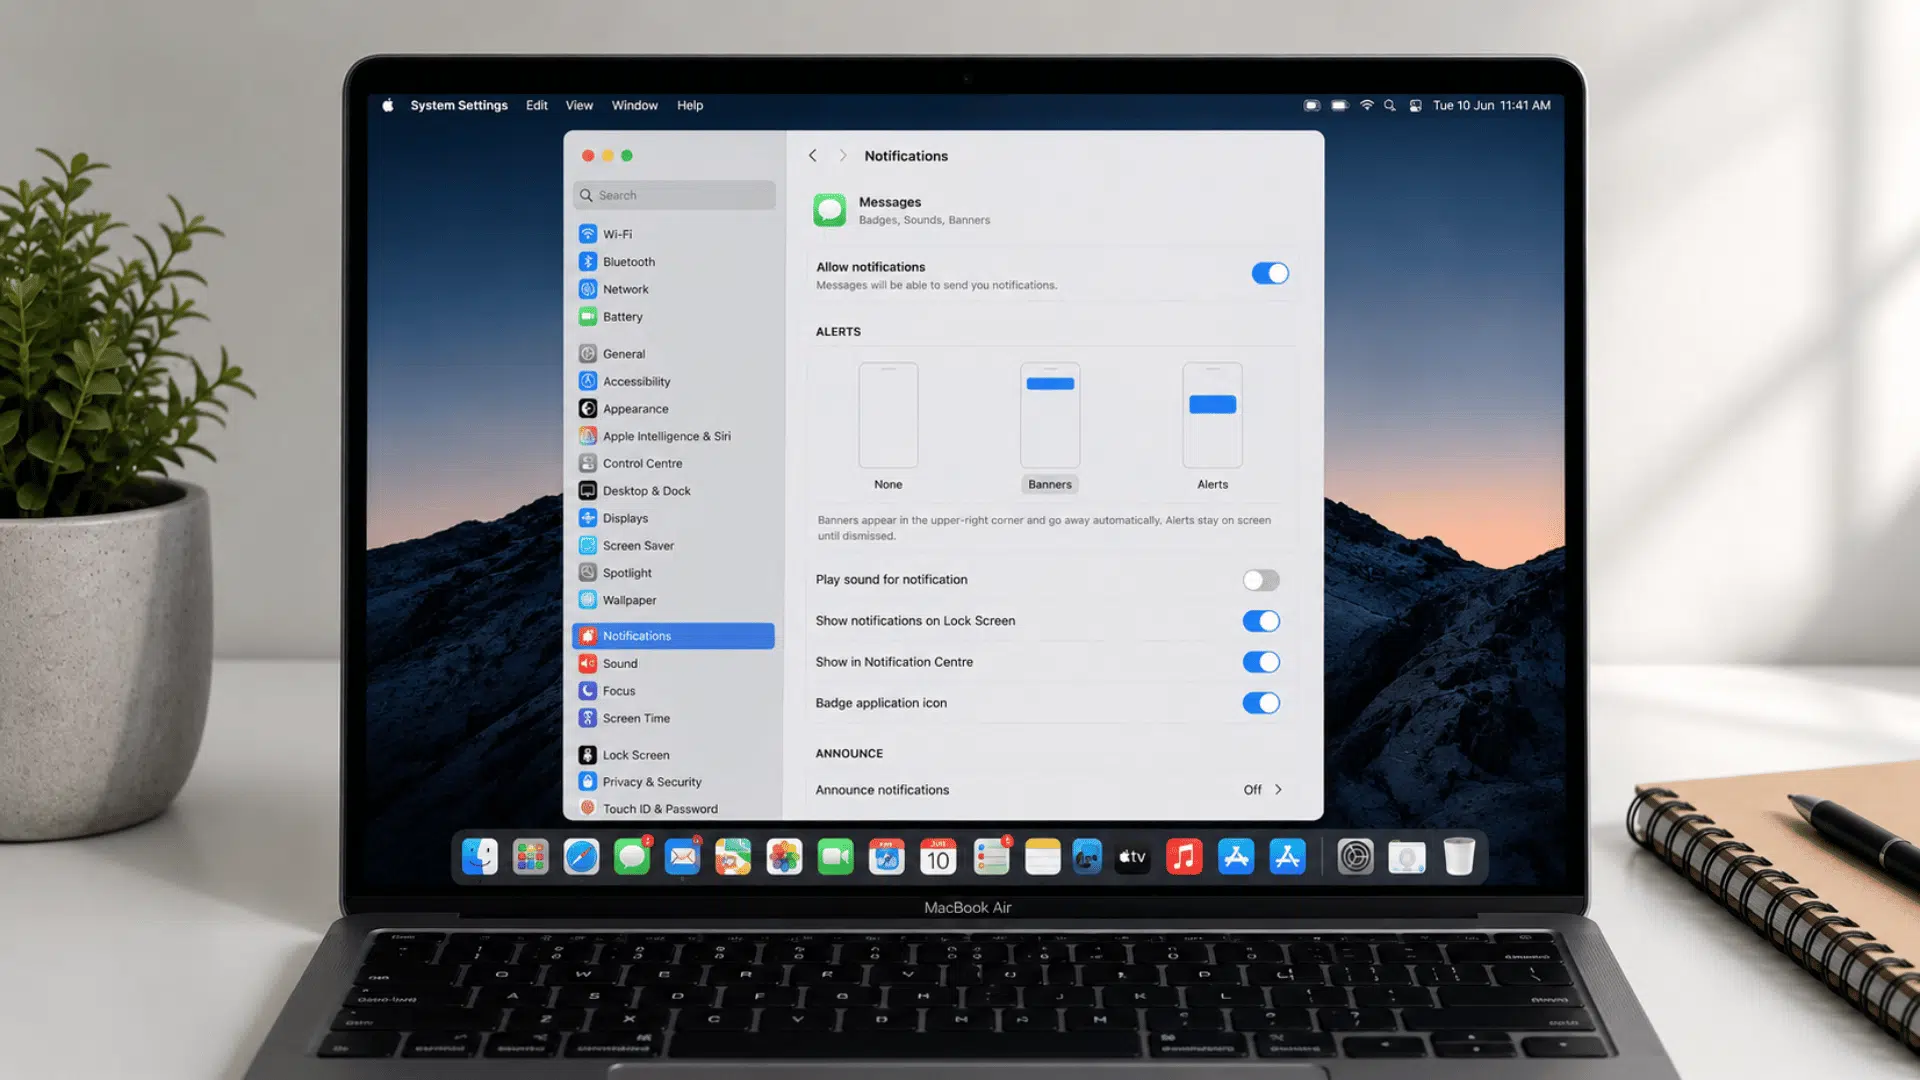
Most of the time, the sound comes from app notifications rather than the Mac itself. You can keep alerts on screen while completely stopping the audio.
Here’s what to do next:
- Click the Apple menu in the top-left corner and open System Settings.
- From the sidebar, select Notifications to view all apps that send alerts.
- Pick an app like Messages, Mail, or Calendar that you’re hearing sounds from.
- Switch off Play sound for notification, so alerts stay silent but still appear visually.
- Repeat for any other apps that are still making noise.
Note: On older macOS versions, you may see System Preferences instead of System Settings, but the options work the same way.
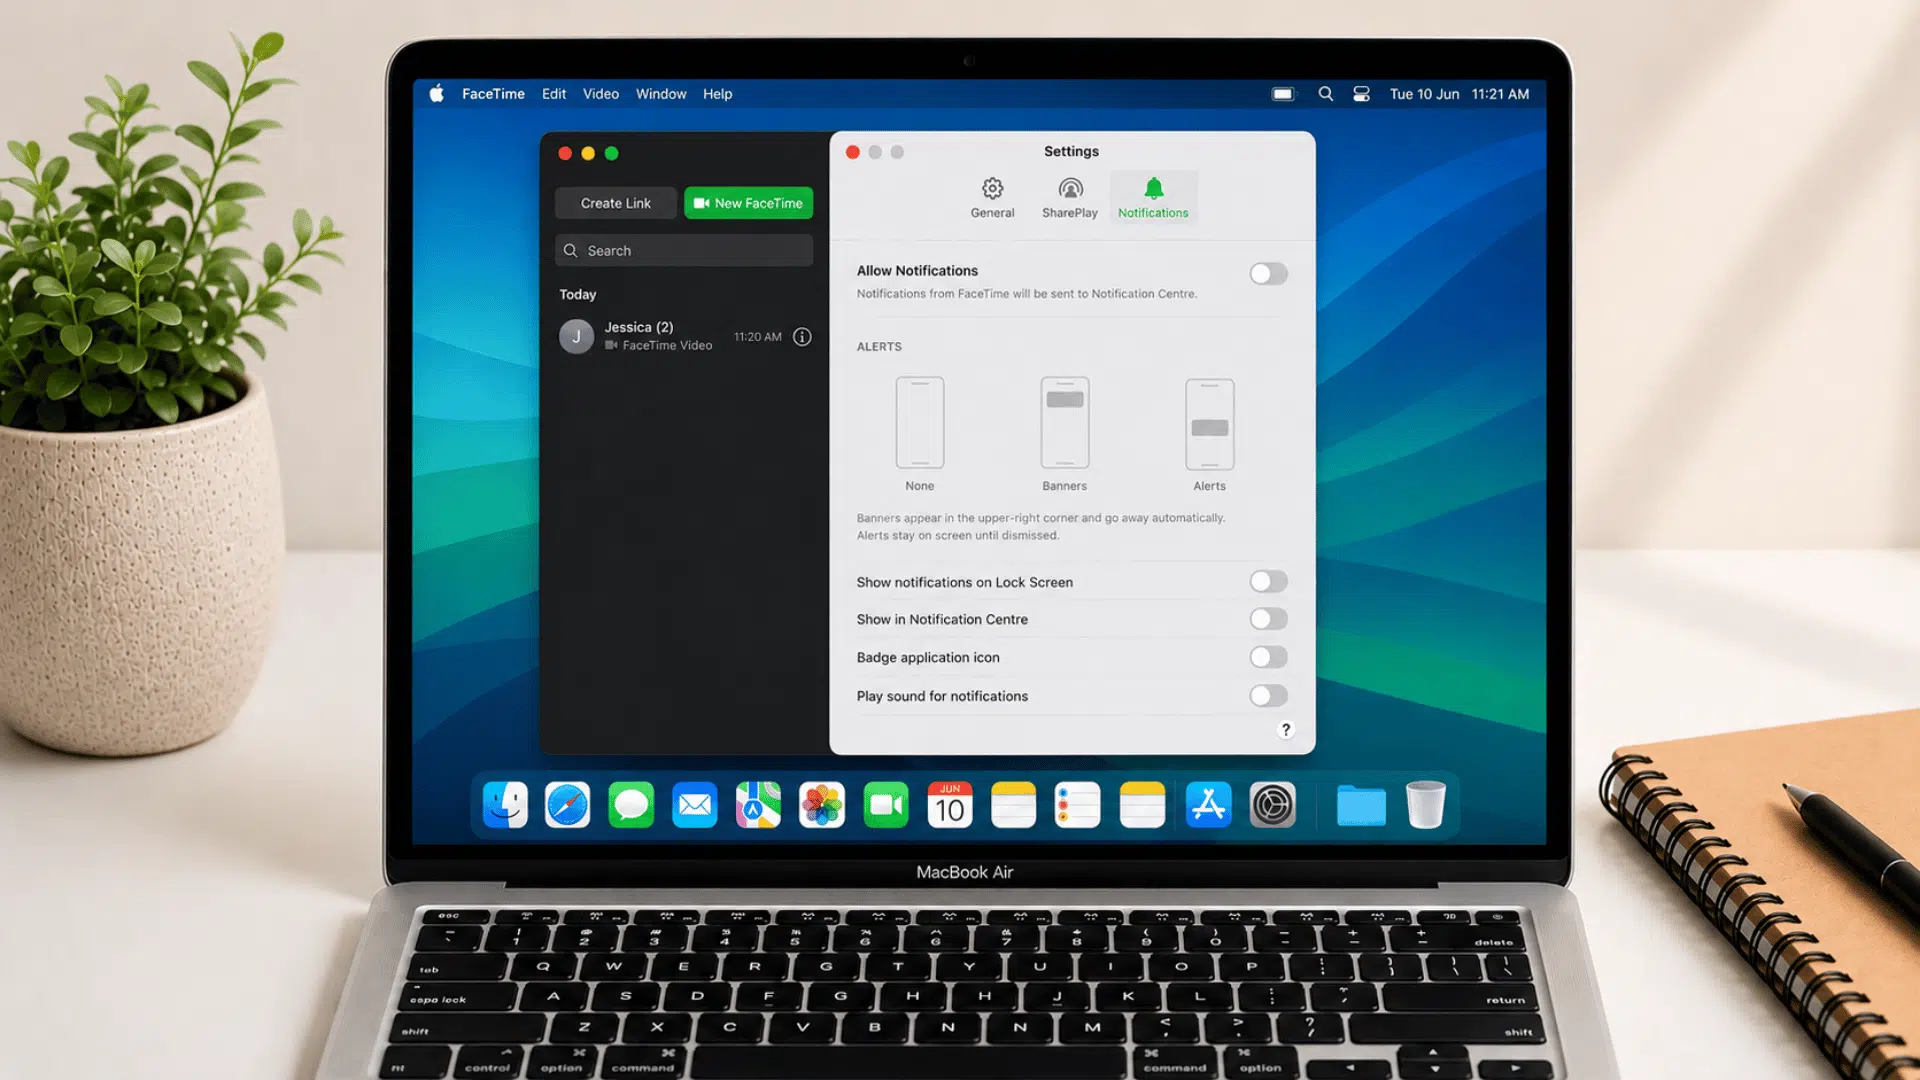
2. Silence FaceTime Calls
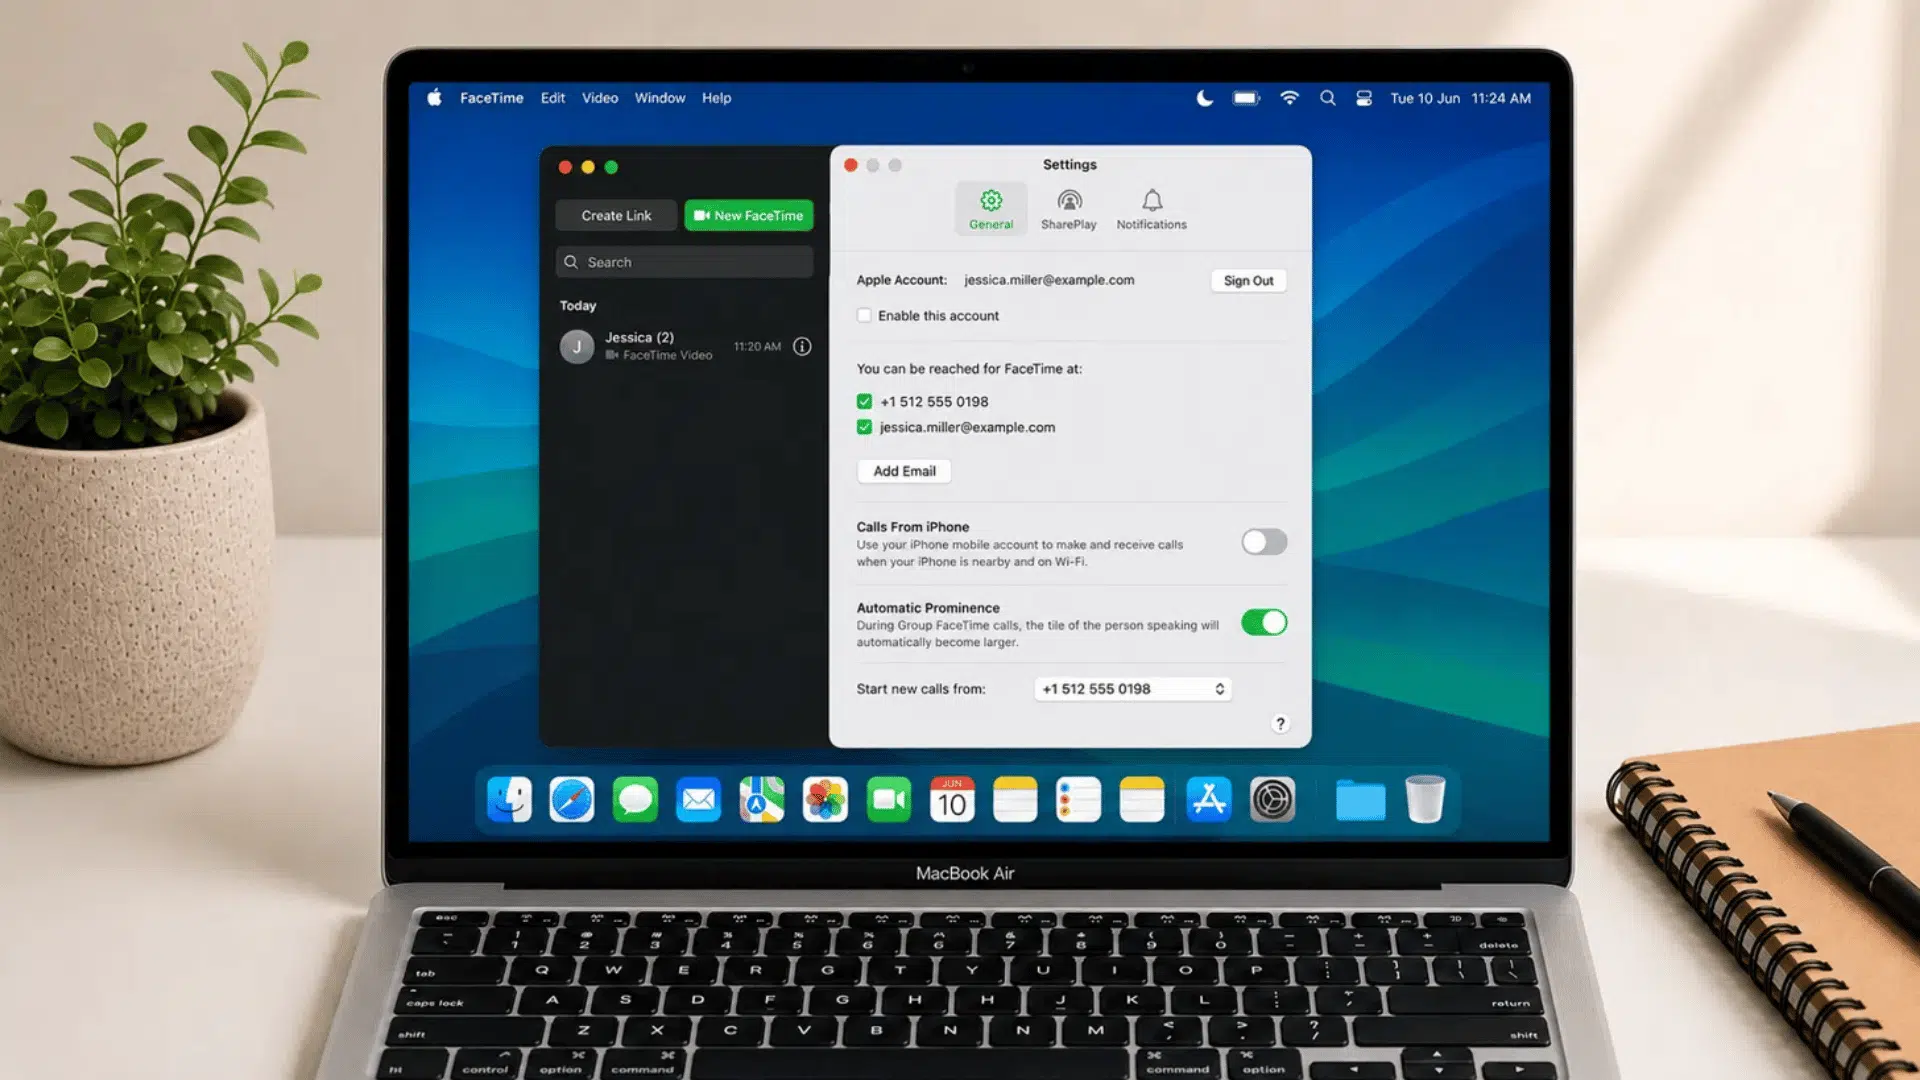
FaceTime alerts can make your MacBook ring even if you usually answer calls on your phone. You can stop these sounds without affecting other notifications.
Here’s how to adjust it:
- Open the FaceTime app from Launchpad, Spotlight Search, or the Applications folder.
- In the top menu bar, click FaceTime and choose Settings.
- Look through the available options and adjust how FaceTime handles incoming calls or alerts.
- If you don’t use FaceTime on your Mac, signing out is also a simple way to stop call notifications completely.
- Close the settings window; changes apply automatically without any extra steps.
Note: On older macOS versions, you may see Preferences instead of Settings, but the controls remain similar.
3. Stop iPhone Calls From Ringing on Your Mac
If your MacBook rings whenever your iPhone gets a call, it’s because both devices are connected through the same Apple ID. You can turn this off so calls stay only on your phone.
You can handle it like this:
- Open the FaceTime app on your Mac from Launchpad, Spotlight Search, or the Applications folder.
- In the menu bar at the top, click FaceTime and select Settings.
- Find the option related to iPhone call forwarding or “Calls From iPhone.”
- Switch it off to stop your Mac from receiving phone call alerts.
- Place a test call to confirm that only your iPhone rings going forward.
Note: This feature works only when both devices share the same Apple ID and call syncing is enabled.
4. Use Focus Mode to Silence Notifications
Focus Mode is another method one should know while learning about how to turn ringer off on macbook, which helps you pause most alerts when you need a quiet setup, without changing your regular sound settings.
It’s useful when you only want temporary silence.
Here’s how to adjust it:
- Click the Control Center icon in the top-right corner of your Mac screen.
- Select Focus from the available options.
- Choose Do Not Disturb or any other Focus mode that fits your situation.
- Set a time limit if you only want it active for a short period, or leave it on until you turn it off manually.
- Open the same menu later to disable Focus Mode when you want alerts back.
Note: On different macOS versions, the Control Center layout may look slightly different, but Focus Mode is available on all recent systems.
Common MacBook Sounds and Where to Turn Them Off
Not every sound on your MacBook comes from the same place. Use the table below to quickly identify what’s making the noise and where you can change the setting:
| Sound You’re Hearing | What Causes It | Where to Turn It Off |
|---|---|---|
| FaceTime ringtone | Incoming FaceTime calls | FaceTime Settings |
| iPhone call ringing | Calls from iPhone are enabled | FaceTime Settings > Calls From iPhone |
| Messages notification | New iMessage or SMS alerts | System Settings > Notifications > Messages |
| Mail notification | New email alerts | System Settings > Notifications > Mail |
| Calendar reminder | Upcoming events or meetings | System Settings > Notifications > Calendar |
| Reminders alert | Scheduled reminders | System Settings > Notifications > Reminders |
| Third-party app notifications | Alerts from apps like Slack, Teams, or Discord | System Settings > Notifications > Select the app |
| Browser audio | Video, music, or website audio | Pause the media or mute the browser tab |
| System alert sound | macOS warning or confirmation sounds | System Settings > Sound |
| Startup sound | MacBook startup chime | System Settings > Sound (supported models only) |
| Focus Mode disabled | Notifications aren’t being silenced | Control Center > Focus |
| Bluetooth headphones setup | Audio playing through a connected device | System Settings > Bluetooth or Sound > Output |
Since different sounds are managed separately, knowing where each one comes from makes it much easier to keep your MacBook quiet.
Final Thoughts
So that’s really all it takes to figure out how to turn the ringer off on a MacBook: a few quick tweaks here and there, and the constant noise disappears for good.
You dont need to scramble anymore to hit mute mid-meeting, or wonder which app just went off in the background again.
Once each setting is adjusted the way it should be, it pretty much stays that way until something’s changed on purpose.
Pick whichever fits the situation, or use all of them together for total silence. So take a few minutes, work through the steps one by one, and enjoy a MacBook that only makes noise when you actually want it to.
Frequently Asked Questions
Can I Silence My MacBook Without Affecting My iPhone?
Yes, your MacBook’s sound settings work independently, so silencing it won’t mute your iPhone.
Why Does My MacBook Ring Only When My AirPods Are Connected?
Your AirPods battery lifespan may be set as the active audio output, causing alerts and calls to play through them instead of your MacBook’s speakers.
Will Restarting My MacBook Turn My Sound Settings Back On?
No, your sound and notification settings usually stay the same after a restart unless you change them yourself.