


If you’ve been setting up a PlayStation emulator, you’ve probably come across the term PlayStation BIOS more than once.
It usually shows up right when you’re eager to start playing. That’s when many users begin looking for answers about what it does and why it matters.
Things can get even more confusing when different emulators handle BIOS files differently. Some require them during setup, while others seem to run without them.
Before you get started, it’s worth taking a quick look at what a is it and how it works. It can also help to understand how PlayStation works before setting up an emulator.
What is a PlayStation BIOS?
A PlayStation BIOS is firmware that was built into Sony’s original PlayStation consoles. It helps the system start up and perform essential functions before a game loads.
When you use a PlayStation emulator, the software attempts to recreate the console’s behavior. A BIOS file helps the emulator handle certain system-level operations more accurately.
That’s why BIOS files are often mentioned alongside emulators like DuckStation, ePSXe, and RetroArch. A properly configured DuckStation BIOS can improve overall compatibility.
Popular PlayStation BIOS Versions You Should Know
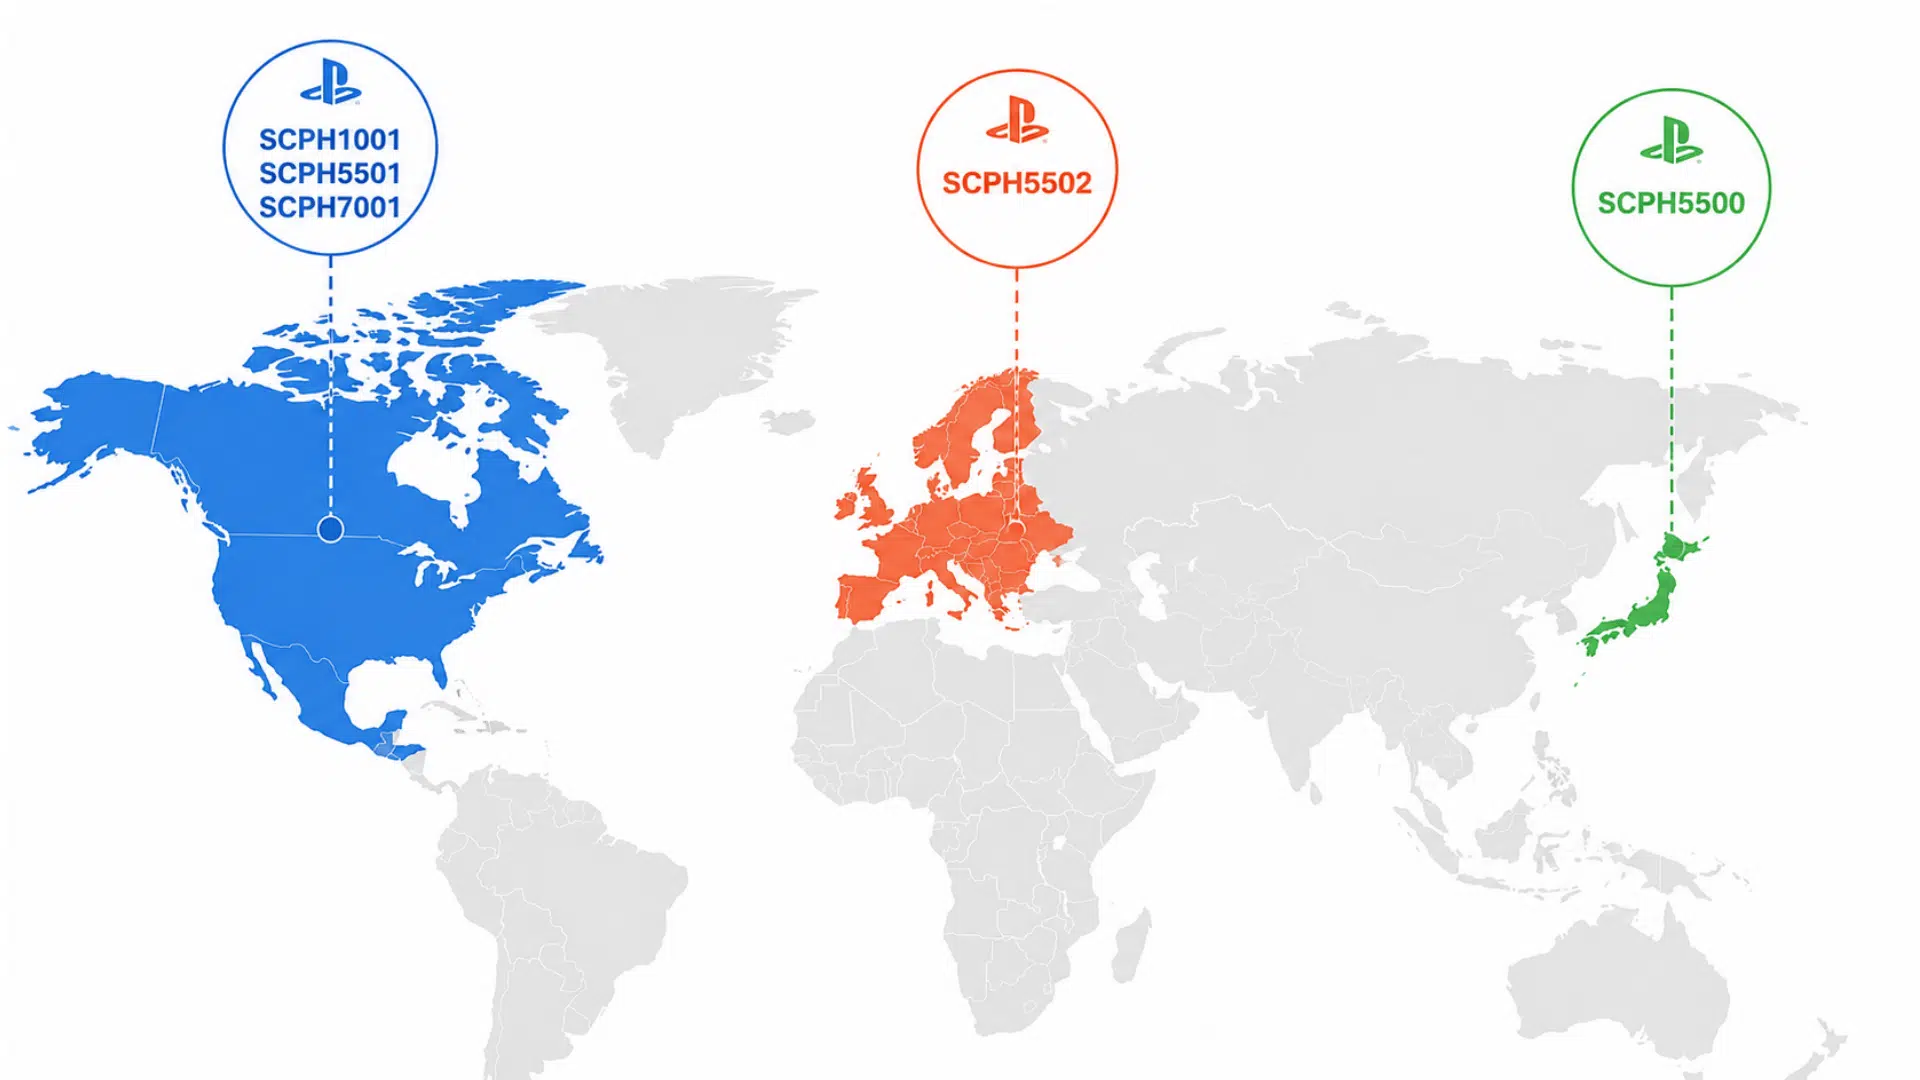
Before downloading a BIOS file, it’s important to know which version you’re looking for. Different BIOS files are associated with different PlayStation regions and may be preferred by certain emulators.
| BIOS Version | Region | Common Use |
|---|---|---|
| SCPH1001 | North America | Frequently used with classic PlayStation emulators |
| SCPH5500 | Japan | Suitable for Japanese PlayStation game releases |
| SCPH5501 | North America | Commonly recommended for DuckStation, ePSXe, and RetroArch |
| SCPH5502 | Europe | Designed for PAL and European PlayStation games |
| SCPH7001 | North America | Used with later PlayStation console revisions |
While several BIOS versions are available, emulator documentation often recommends checking compatibility requirements before selecting a specific file.
Once you’ve identified the correct BIOS version, the next step is to download and configure it for your emulator.
Steps to Download PlayStation BIOS Files with Emulators
The process of downloading BIOS files can vary slightly from one emulator to another. Below are the steps for DuckStation, RetroArch, and ePSXe:
Note: PlayStation BIOS files are part of the original PlayStation system software. Before downloading one, it’s a good idea to review the applicable laws in your region and ensure you’re obtaining the file from a legitimate source.
How to Download PlayStation BIOS for DuckStation?
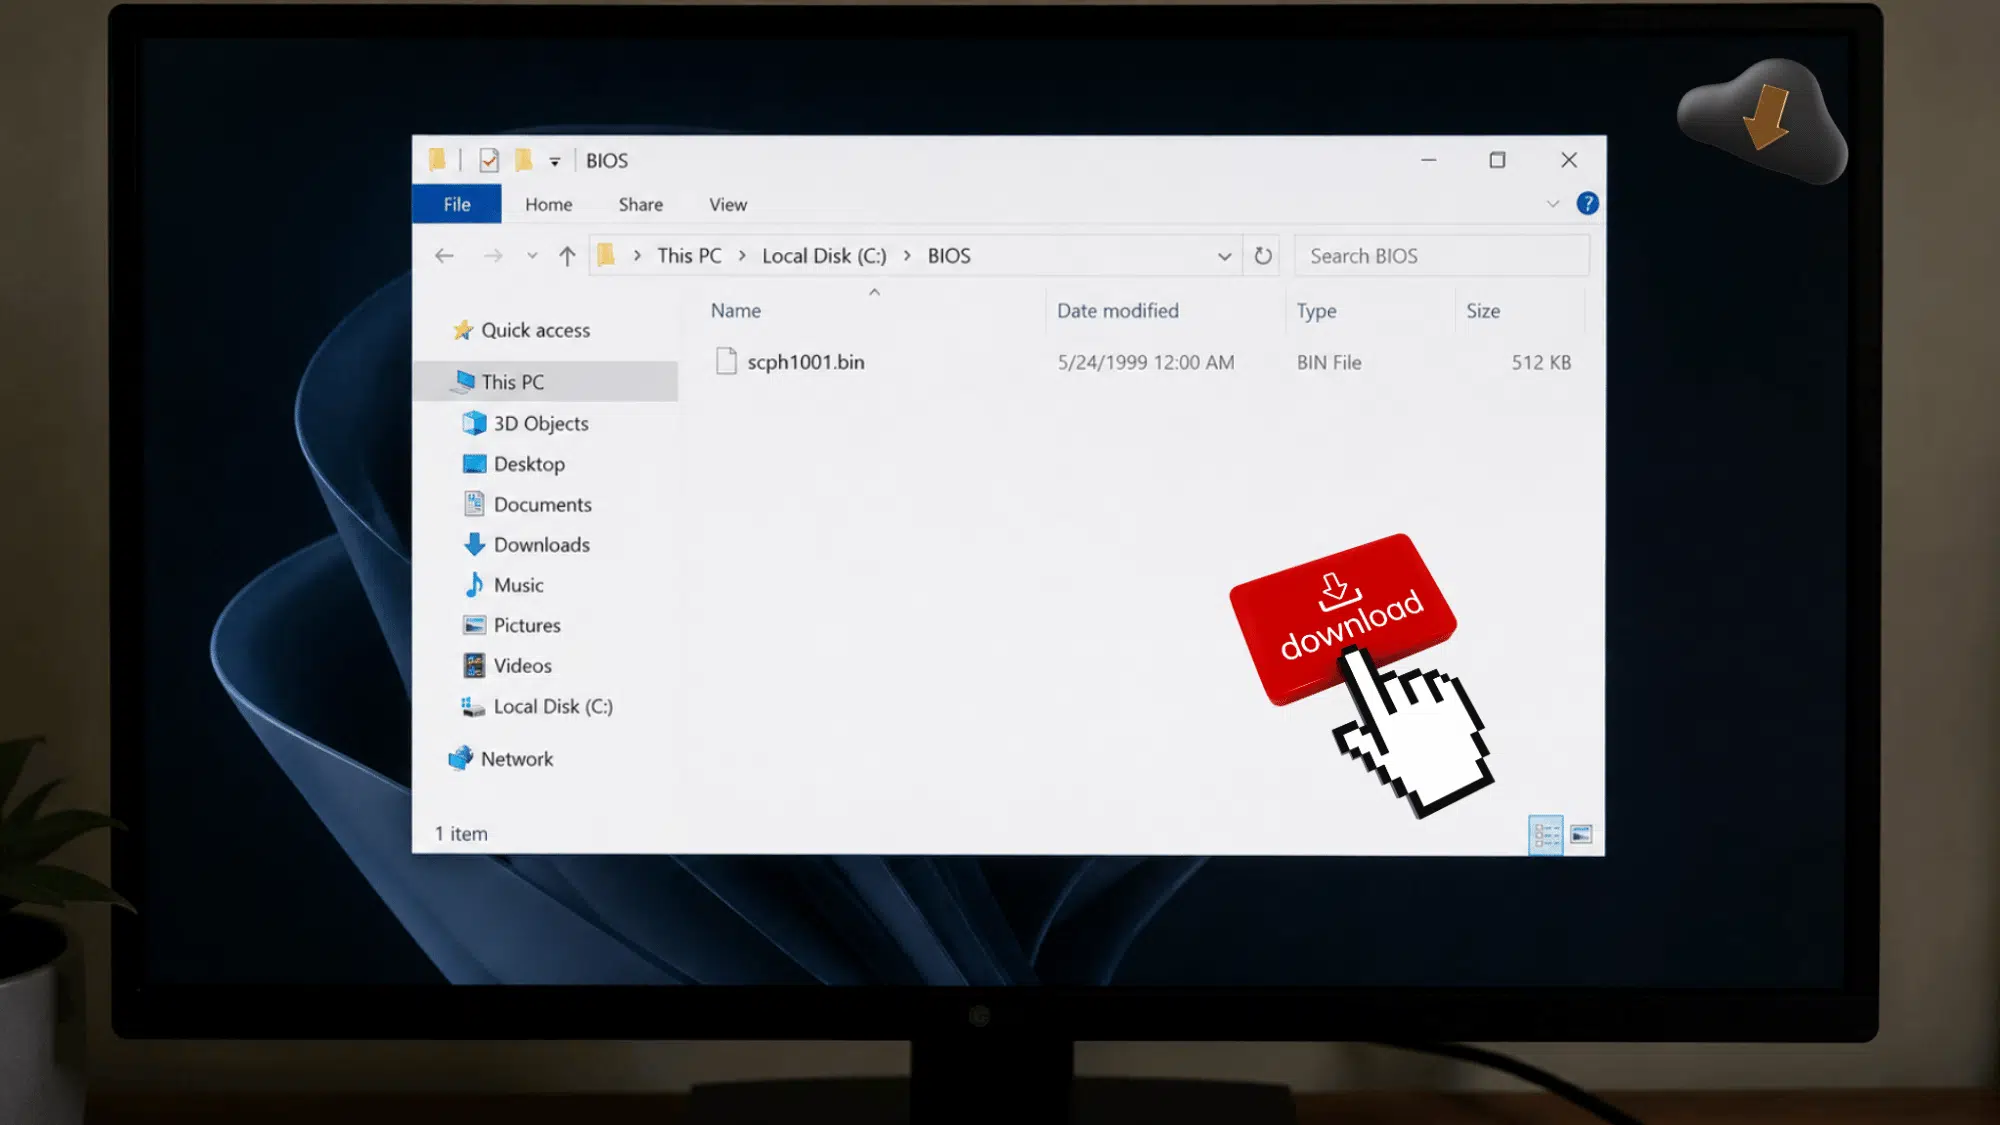
Download a BIOS file that is compatible with DuckStation and place it in the appropriate BIOS directory. Getting this right the first time saves you a lot of back-and-forth troubleshooting later.
You can then configure it through the emulator’s settings.
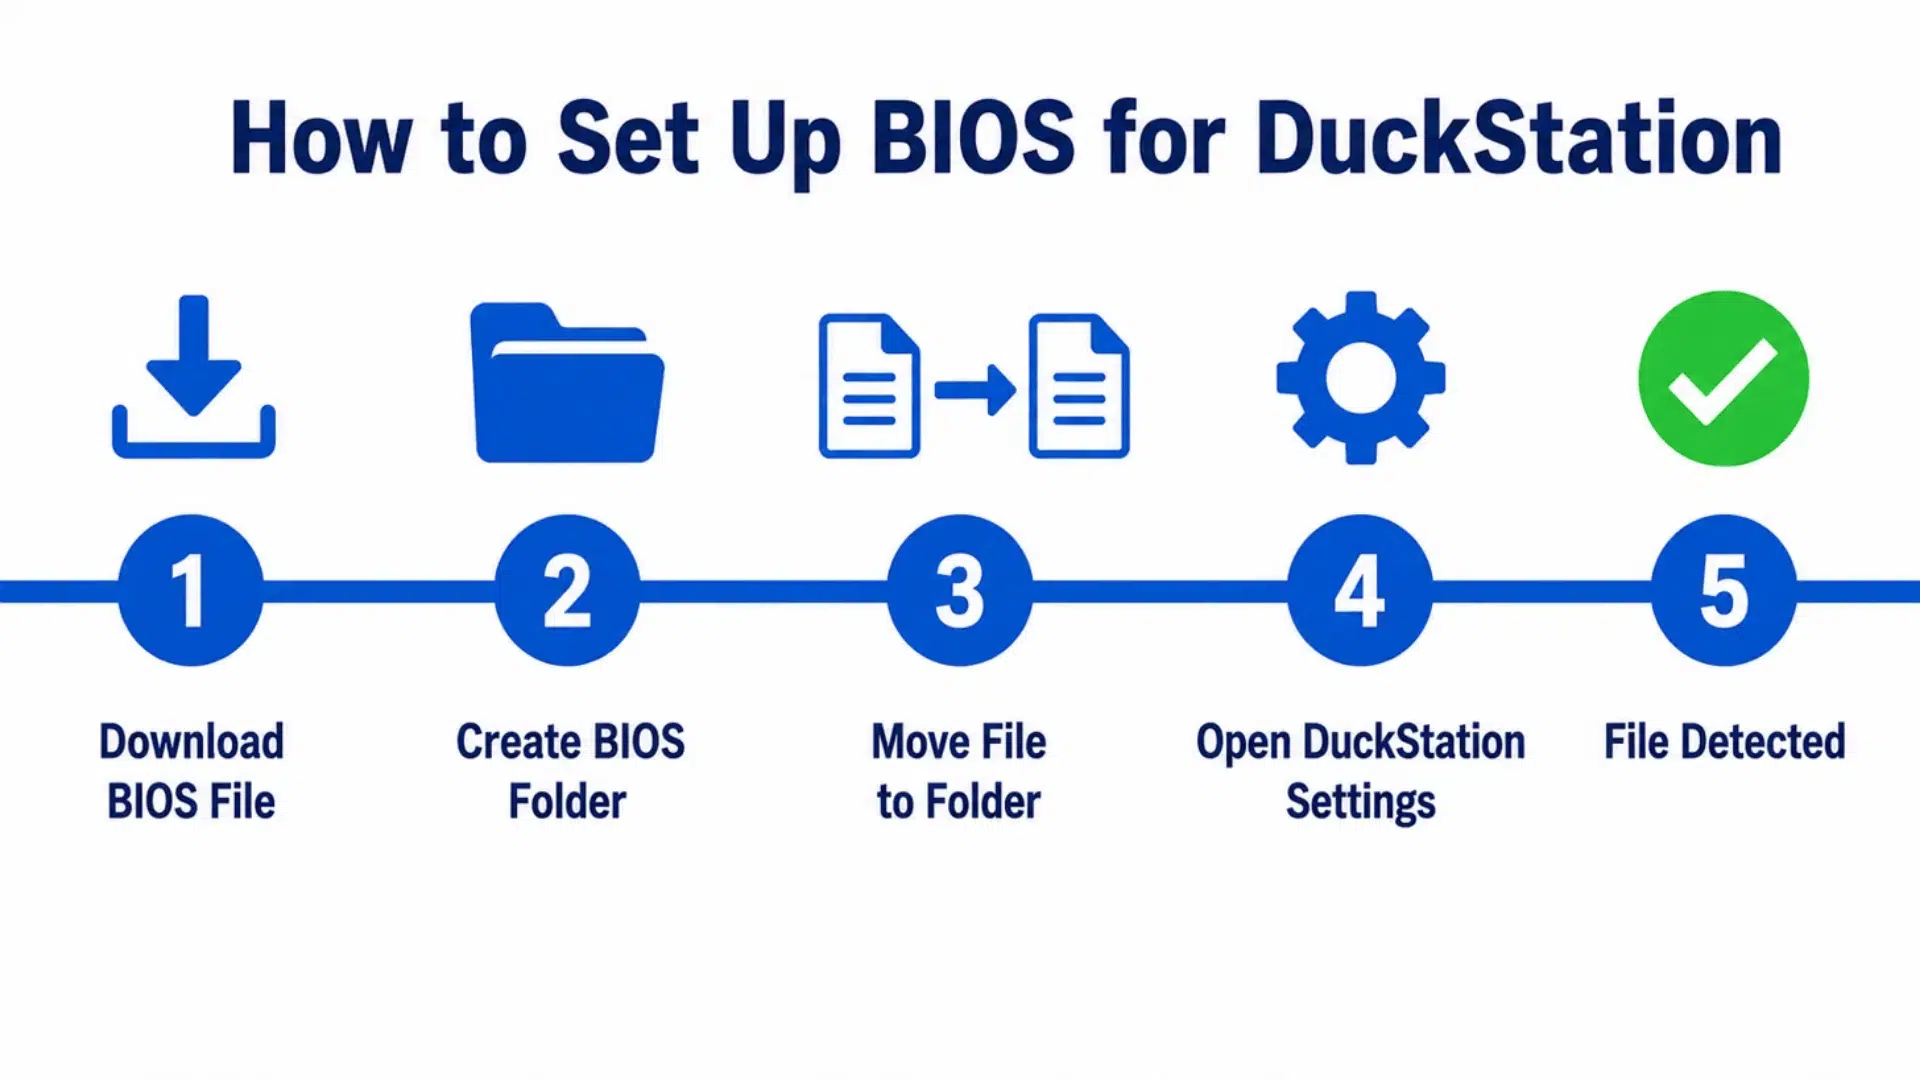
- Step 1: Download a compatible BIOS file from a trusted source.
- Step 2: Create a dedicated BIOS folder on your device.
- Step 3: Move the downloaded BIOS file into the folder.
- Step 4: Open DuckStation and access the BIOS settings menu.
- Step 5: Select the BIOS folder and confirm that the file is detected.
Pro Tip: BIOS detection issues are often caused by incorrect folder paths, so double-check the selected directory if the file doesn’t appear.
Download PlayStation BIOS for Retro Arch with These Steps
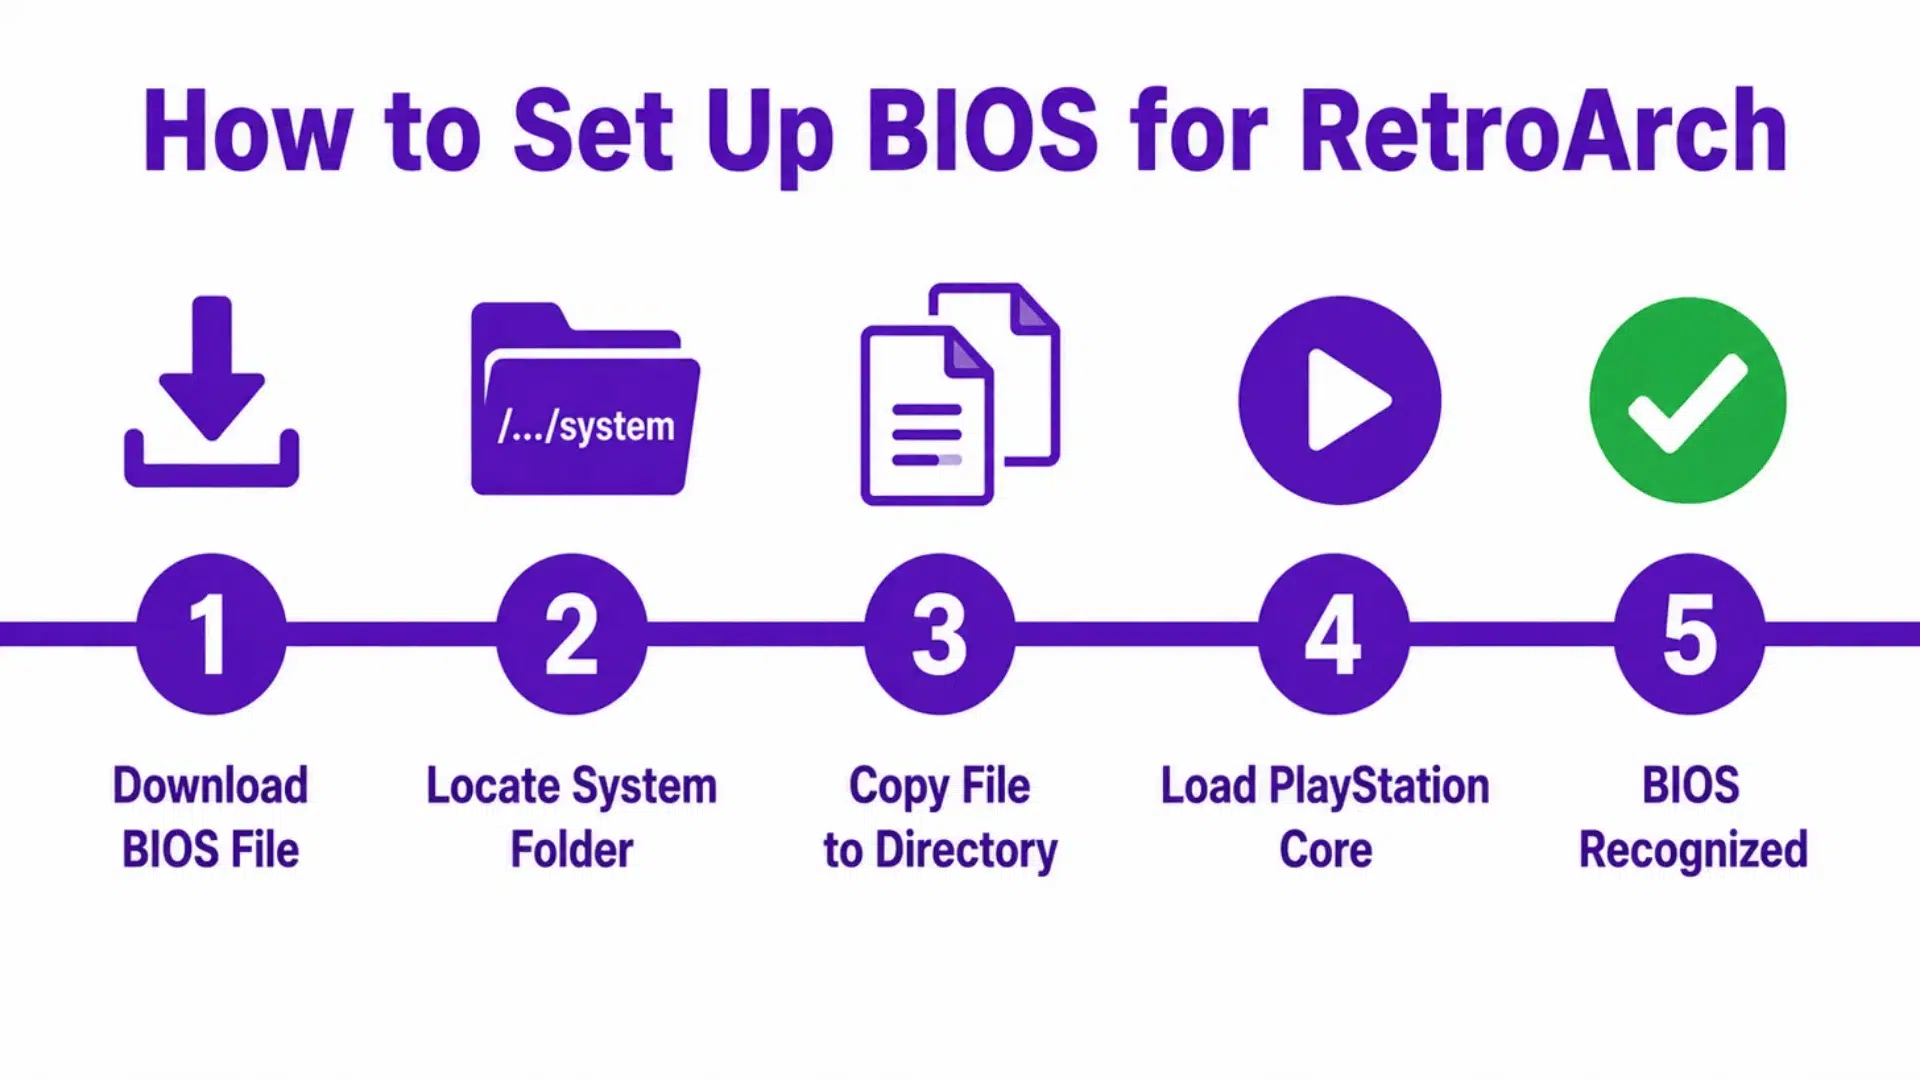
RetroArch uses BIOS files for certain PlayStation cores. Placing the file in the correct location is essential for proper detection. Even a small mistake in the folder path can prevent the core from recognizing the file at all.
- Step 1: Download a BIOS file supported by your RetroArch core.
- Step 2: Open RetroArch and locate the system folder path.
- Step 3: Copy the BIOS file into the system directory.
- Step 4: Launch RetroArch and load a PlayStation core.
- Step 5: Verify that the BIOS file is recognized before starting a game.
Pro Tip: Keep the BIOS filename unchanged, as some RetroArch cores require specific filenames to detect the firmware correctly.
How to Download PlayStation BIOS for ePSXe?
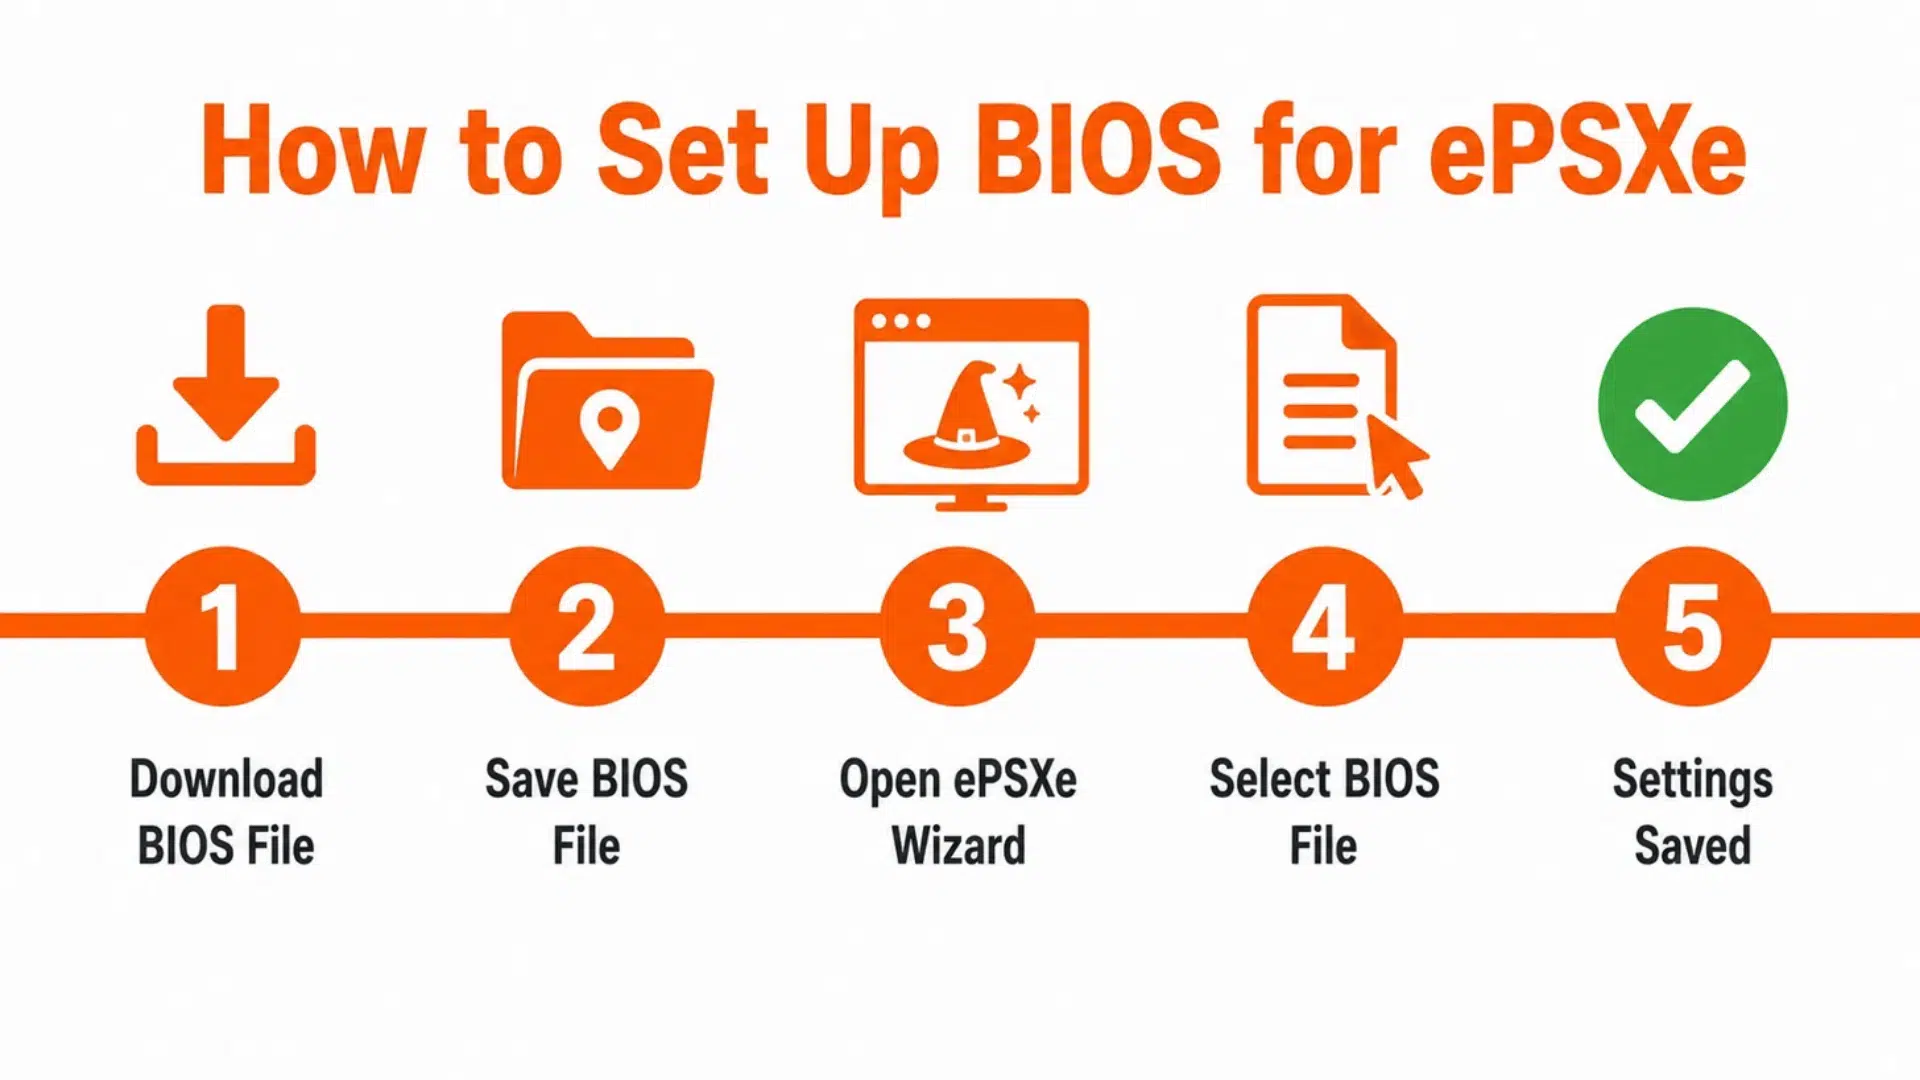
ePSXe allows you to manually select a BIOS file during setup. The process only takes a few minutes to complete. And since ePSXe walks you through the configuration with a wizard, there’s not much room to get lost.
- Step 1: Download a BIOS file that is compatible with ePSXe.
- Step 2: Save the BIOS file in an easy-to-access location.
- Step 3: Open ePSXe and launch the configuration wizard.
- Step 4: Navigate to the BIOS selection section.
- Step 5: Select the downloaded BIOS file, then save your settings.
Pro Tip: If ePSXe cannot find the BIOS file, restart the emulator and check that the file was downloaded completely.
Picking the Right Emulator: ePSXe, DuckStation, and RetroArch
Not all PlayStation emulators work the same way, and picking the wrong one can mean extra setup headaches for no reason. ePSXe, DuckStation, and RetroArch each handle BIOS files, performance, and compatibility a little differently.
Here’s a quick breakdown so you can pick the one that fits your setup best:
| Feature | ePSXe | DuckStation | RetroArch |
|---|---|---|---|
| Best For | Beginners | Modern performance | Advanced users |
| BIOS Setup | Manual selection | Folder-based | System directory |
| User Interface | Simple | Clean & modern | Complex |
| Game Compatibility | Good | Excellent | Varies by core |
| Performance | Moderate | High | Depends on core |
| Plugin Support | Yes | Limited | No |
| Active Development | No | Yes | Yes |
| Platform Support | PC, Android | PC, Android, Mac | PC, Android, Mac |
| Setup Difficulty | Easy | Easy | Moderate to Hard |
| Recommended For | Casual players | Most users | Power users |
What to Do If Your BIOS File is Not Detected?
If your emulator cannot detect the BIOS file, start by checking that it is in the correct folder. A misplaced file is one of the most common causes of detection issues.
You should also verify that the BIOS filename hasn’t been changed. Some emulators rely on specific filenames and may fail to recognize renamed files.
Another thing to check is if the BIOS file is complete and free from corruption. Replacing a damaged file often resolves unexpected setup problems.
If the issue persists, restart the emulator and review its BIOS settings. In many cases, reselecting the BIOS directory is enough to restore proper detection.
Final Thoughts
Setting up a PlayStation BIOS sounds intimidating at first, but honestly, it’s not that bad once you know what you’re doing. You’ve got the steps, you’ve got the emulator options, and now you’ve got zero excuses to keep putting it off.
Just grab the right file, drop it in the correct folder, and let your emulator do the rest. DuckStation, RetroArch, ePSXe, whichever one you picked, this is really what ties the whole setup together.
Get that part right, and you’ll be loading up your favorite PlayStation games before you know it.
Frequently Asked Questions
Can I Use the Same BIOS File on Multiple Emulators?
Yes, the sameBIOS file can often be used for DuckStation, RetroArch, and ePSXe.
Do BIOS Files Affect Game Performance?
A BIOS file mainly improves compatibility and accuracy rather than increasing performance.
What format are BIOS Files In?
Most BIOS files are available in BIN format.
How Large is a BIOS File?
A BIOS file typically requires less than 1 MB of storage space.