


Building a fillable form sounds complicated. It’s one of those things that feels hard until you actually try it.
Microsoft Word has everything needed to create clean, clickable forms, dropdown lists, and more, especially when following Word checkbox steps.
Most of it is already built in. It just takes knowing where to look. And that’s the thing, a lot of people have Word open every single day without realizing what it’s actually capable of.
A few simple steps are all it takes. So, stick around and see just how easy this can get.
Why Should You Use Microsoft Word for Fillable Forms?
Microsoft Word is one of the easiest tools for creating fillable forms. Most people already have it on their computer, so there’s no need to download anything new.
It lets you add text boxes, checkboxes, and dropdown menus with just a few clicks. You can also protect the form so others can only fill in the blanks, not accidentally change your layout.
Even if you’re making a job application, survey, or order form, Word keeps everything looking clean and professional. Plus, you can save and share it as a PDF when you’re done.
How to Build a Fillable Form with Checkbox Fields in Word
Creating a fillable form in Word may look complicated at first, but once you see the steps, it becomes simple. You’re mostly working with tools that are already built into Word.
Follow the steps given below to create a clean, working form with checkboxes and fields.
Step 1: Set Up Your Form Layout First
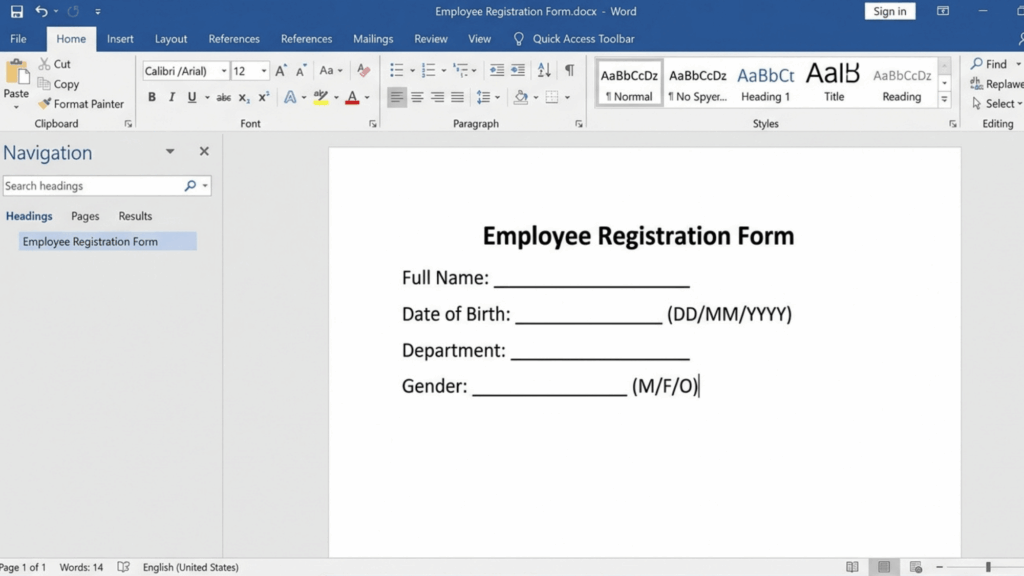
Before adding any fields, create the structure of your form. This helps you see where everything will go and keeps things organized from the start. Type your title, headings, and questions just as you would in a normal document.
Add labels like name, date, or options clearly so users know what to fill. Keep the layout neat and spaced out. You can also use tables to properly align everything, making your form look clean and easy to follow.
Step 2: Turn On the Developer Tab
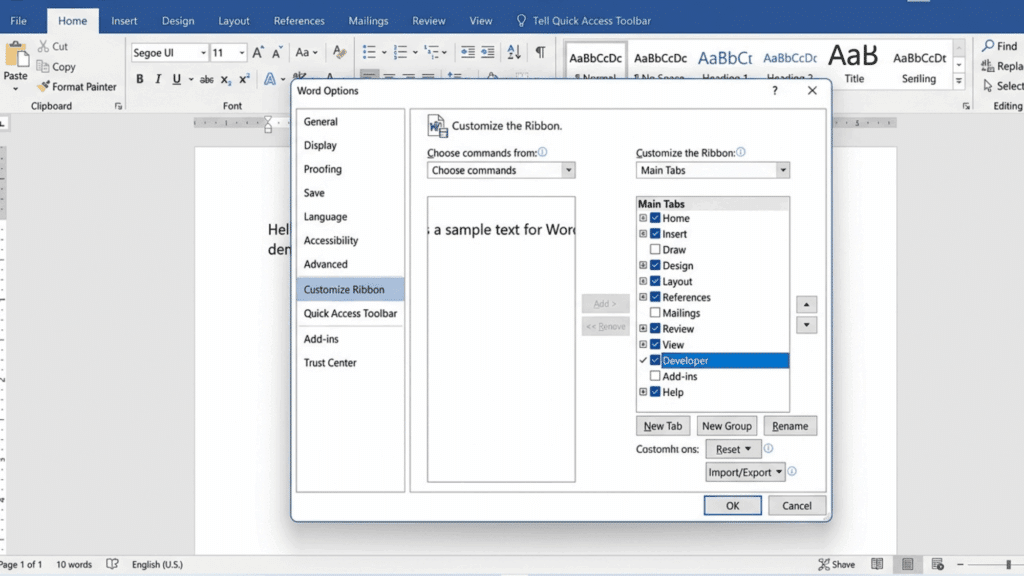
Now it’s time to enable the tools needed to make the form fillable. Without this step, you won’t be able to insert checkboxes or input fields.
Go to File → Options → Customize Ribbon, then tick the Developer option and click OK. Once it’s turned on, you’ll see a new tab at the top. This is where all your form controls will be.
Step 3: Add Text Fields and Form Boxes

Next, start adding areas where users can type their answers. This is useful for things like names, emails, or short responses. Click where you want the field, then go to the Developer tab and choose a text control.
Place each field next to its label so everything stays clear. This step helps turn your document into something interactive instead of static.
Step 4: Insert Checkbox Fields
Now add the checkbox fields for options or selections. These are perfect for lists where users can choose one or more answers. Click where you want the checkbox, then select the checkbox control from the Developer tab.
Type your option next to it, then repeat or copy-paste for more choices or add dropdown options. This keeps your form consistent and quick to build.
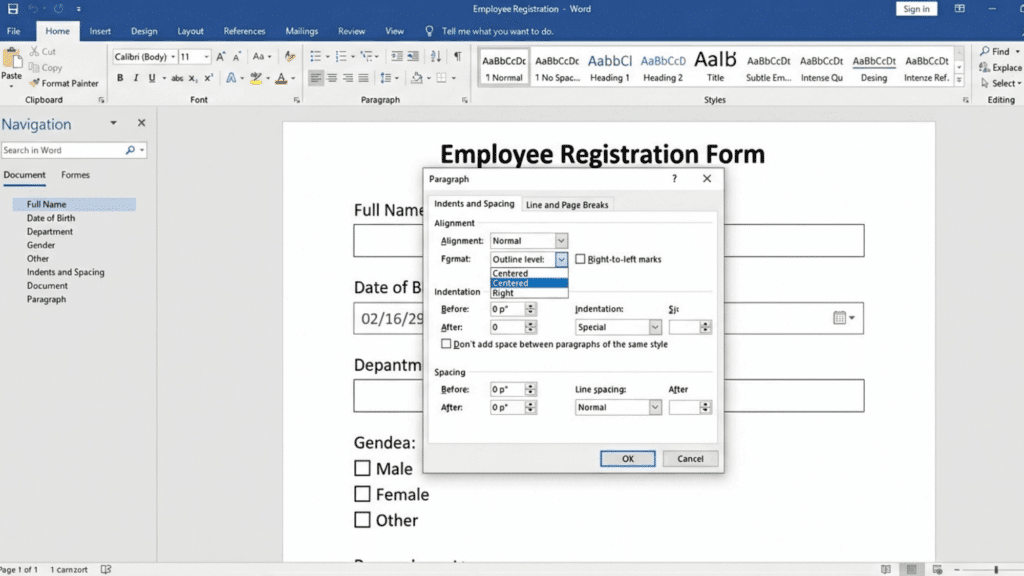
Step 5: Align and Adjust Your Form
At this stage, take a moment to clean up the layout. Small adjustments can make a big difference in how your form looks and feels. Make sure all fields line up properly, and spacing looks even.
If needed, use tables or simple formatting tools to keep everything straight and easy to scan. A neat layout makes the form easier to fill out.
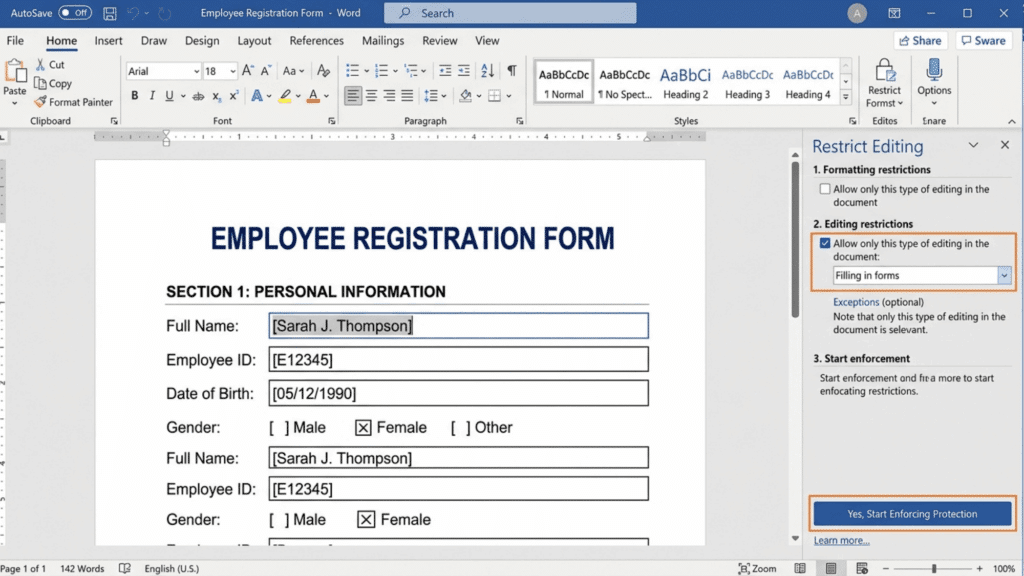
Step 6: Protect the Form to Make It Fillable
Now turn your document into a real fillable form by locking the layout. This prevents users from editing the structure. Go to Restrict Editing, choose Filling in forms, and apply the settings.
This allows users to only click checkboxes or enter text, without changing anything else.
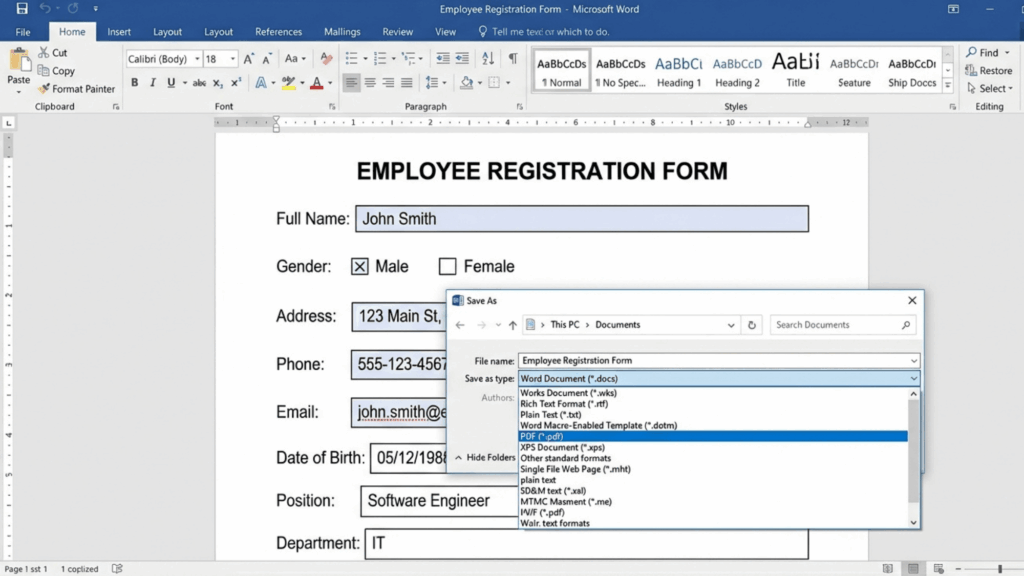
Before sharing, always test your form to make sure everything works smoothly. This helps you catch small issues early.
Click through each field and checkbox to see if they respond properly. Then save your file as a Word document or export it as a PDF. Your form is now ready to share and use.
Tips that Can Make Your Form Look Professional
A good fillable form should not only work well but also look clean and easy to use. If your form feels messy or crowded, people may get confused or skip parts.
Here are a few small changes that can make your form look neat, clear, and professional:
- Use tables to keep fields and checkboxes neatly aligned
- Group related questions together so the flow feels natural
- Choose one clean font and keep the size consistent
- Add a short instruction line at the top for guidance
- Leave enough white space so the form doesn’t feel cramped
- Keep labels clear and easy to understand
- Make sure all fields are evenly spaced
- Review the form once to catch any missing or unclear parts
- Avoid adding extra questions that aren’t really needed
- Apply form protection only after everything is finalized
It’s a Wrap
Fillable forms do not have to be complicated. And after going through all of this, it is clear that Word can handle the job just fine. The steps are simple. The tools are already there.
And the whole thing takes maybe ten minutes. If it is a quick survey or a detailed application, the same steps apply every time. Enable, build, insert, protect, share. That is really it.
So do not let the idea of “form building” feel like a big task anymore. Now it is all just a matter of opening Word and getting started.