


Nobody wants to read through a messy, hard-to-fill document. It wastes time and causes confusion, and most of it is completely avoidable.
Word has some really handy built-in features that make any document cleaner and more interactive. No extra software, no complicated setup. Just a few simple steps.
And once it is set up right, filling out a form feels effortless for everyone involved. Here is how to make that happen.
Dropdowns vs. Checkboxes: Which One Should You Use?
They are both simple tools that turn a basic Word document into an interactive document when you insert Word checkboxes. The first one lets users pick one answer from a hidden list, keeping things neat and controlled.
Checkboxes, on the other hand, show all options upfront and let users select as many as they need. Knowing the difference helps you design forms that feel easy and natural to fill.
| Feature | Dropdowns (Drop-down List) | Checkboxes (Select Boxes) |
|---|---|---|
| Best For | Choosing one option from a list | Selecting one or multiple options |
| User Action | Click → open list → select option | Click to check/uncheck |
| Input Control | Limits users to predefined answers | Allows flexible multiple selections |
| Space Usage | Saves space (compact design) | Takes more space (each option visible) |
| Use Cases | Yes/No, gender, approval status | Tasks, preferences, multiple choices |
| Flexibility | Fixed options only | Can select many at once |
| Ease of Use | Slightly more steps (open + select) | Very quick (just click) |
| Best Example | “Do you agree? → Yes/No.” | “Select your hobbies.” |
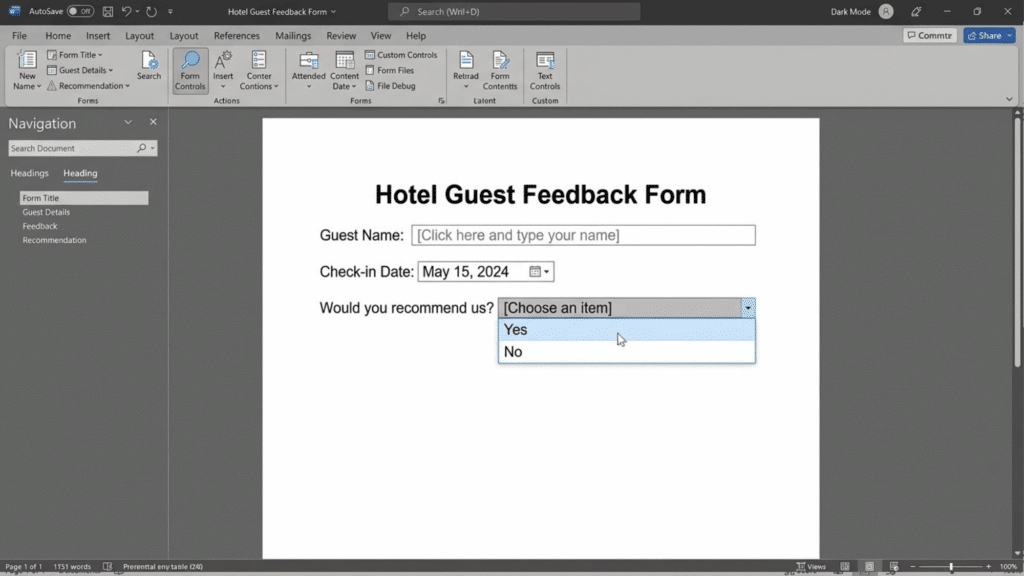
How to Add Yes/No Dropdowns in Microsoft Word
Adding a Yes/No dropdown in Word is a simple way to make your document cleaner and easier to fill out. It keeps responses consistent and eliminates the need to type. Let’s walk through the exact steps to set it up:
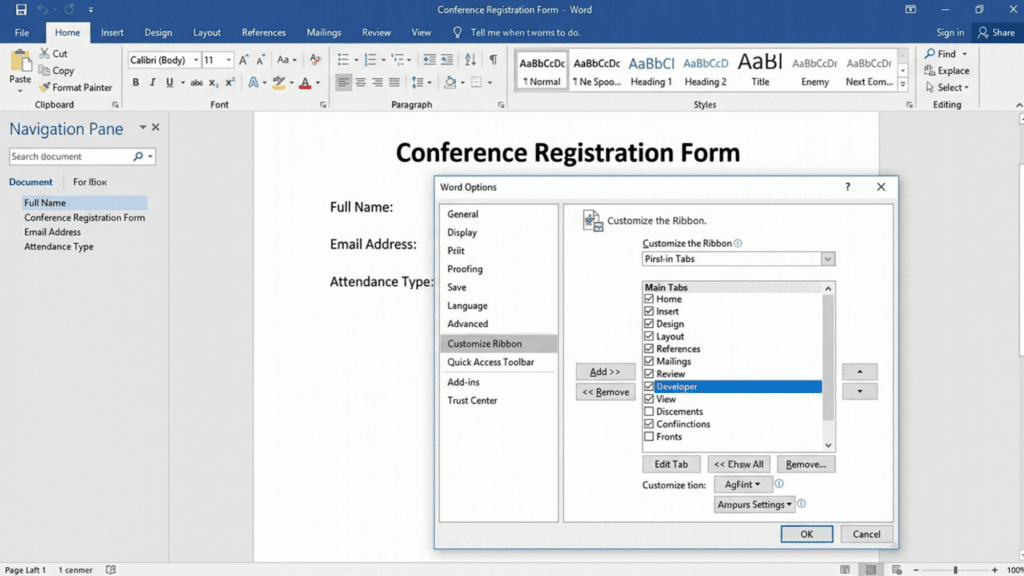
Step 1: Enable the Developer Tab
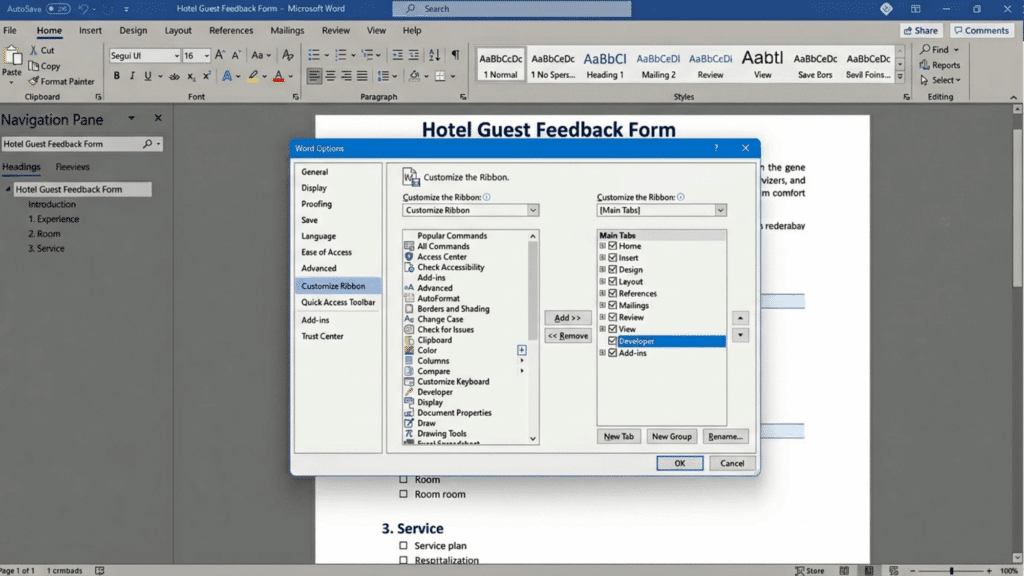
Before you can add a dropdown, you need access to the right tools in Word. This step unlocks the Developer tab, which is where everything happens. Here’s how to turn it on:
- Go to File → Options
- Click Customize Ribbon
- Check the box next to Developer
- Click OK
- The Developer tab will now appear in your top menu
Step 2: Insert a Dropdown Control
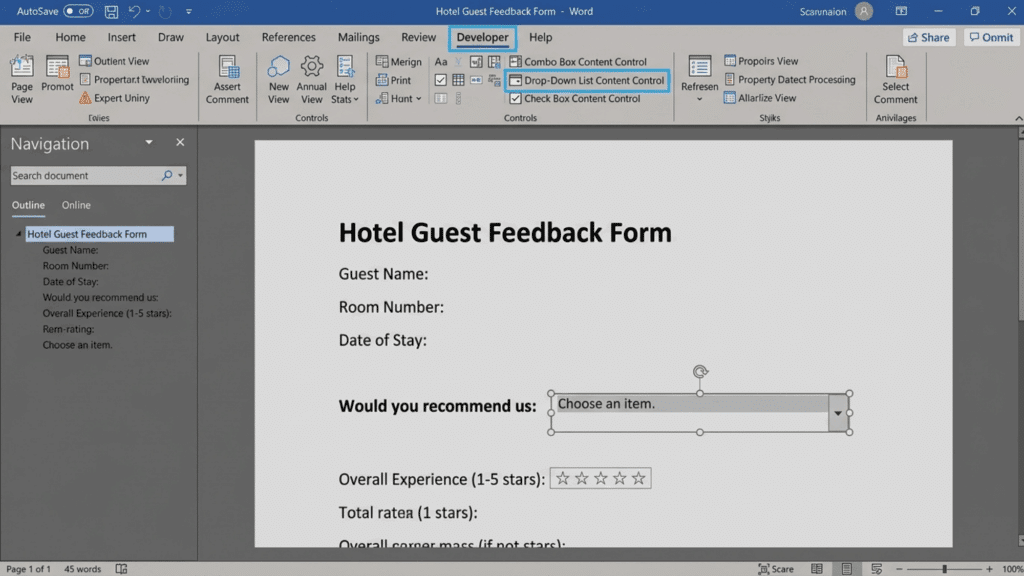
Now that the Developer tab is visible, you can add the actual dropdown field to your document. This is where users will click and choose their answer. Follow these quick steps:
- Place your cursor where you want the dropdown
- Click the Developer tab
- Select Drop-Down List Content Control
- A dropdown box will appear instantly
- This field is now ready to be customized
Step 3: Add Yes and No Options
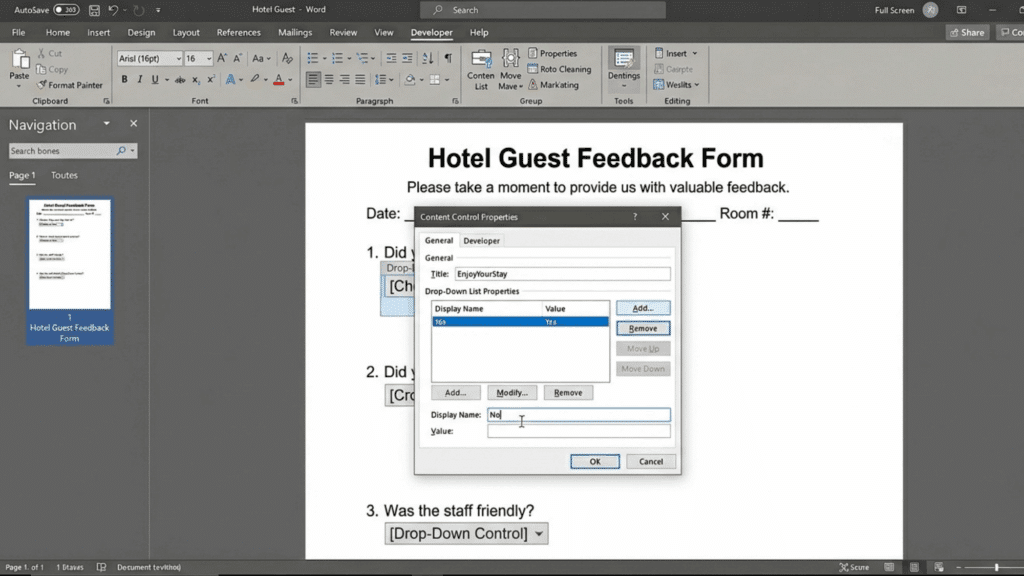
At this point, your dropdown is in place, but it’s still empty. You just need to add the Yes and No choices so it works properly. Here’s exactly what to do:
- Click on the dropdown box
- Select Properties from the Developer tab
- Click Add
- Type Yes, then click OK
- Click Add again and type No
- Remove any default options you don’t need
Step 4: Test Your Yes/No Dropdown

Before you move on, it’s a good idea to make sure everything works as expected. A quick test helps catch any small mistakes early. Try this:
- Click the dropdown arrow
- Select Yes or No
- Confirm both options appear correctly
- Make sure the placement looks right
Step 5: (Optional) Lock the Dropdown for Editing
If you’re sharing the document, you might want to prevent users from editing anything except the dropdown. This keeps your form clean and structured. Here’s how to lock it down:
- Go to the Developer tab
- Click Restrict Editing
- Choose Filling in forms
- Click Start Enforcement
- Users will now only interact with the dropdown
Learn About Adding Clickable Select Boxes in Microsoft Word
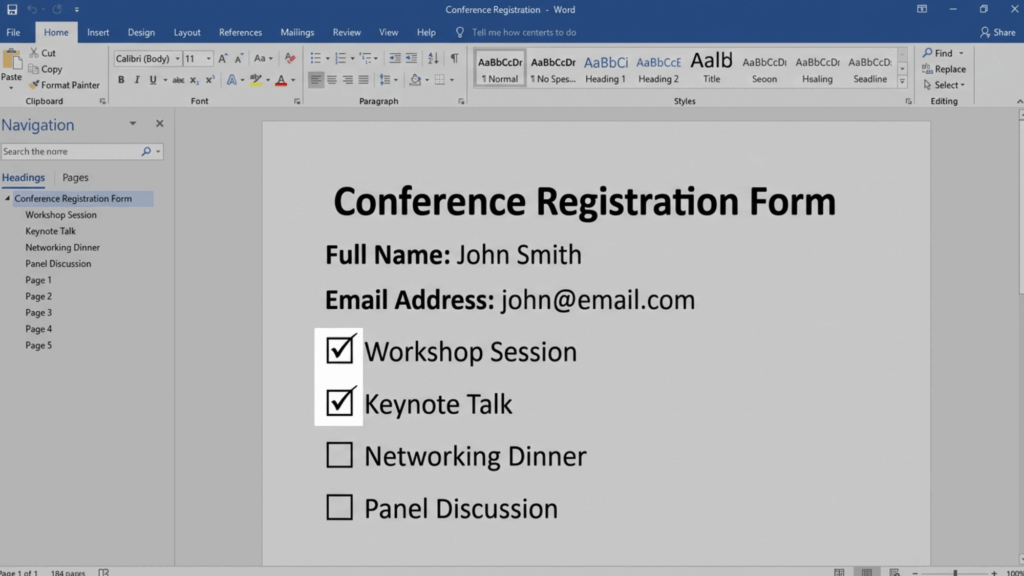
Select boxes, also known as checkboxes, are ideal for letting users quickly select one or more options.
They’re commonly used in forms, checklists, and agreements to keep things simple and organized, especially in structured task lists. Let’s read how to add them step by step to your document:
Step 1: Turn On the Developer Tab
To insert checkboxes, you’ll need access to the Developer tab in Word. If it’s not already visible, you’ll have to enable it first. This step unlocks all the form controls you’ll need, including checkboxes.
Once enabled, you’ll see a new tab appear in your ribbon. From there, you’re ready to start adding select boxes.
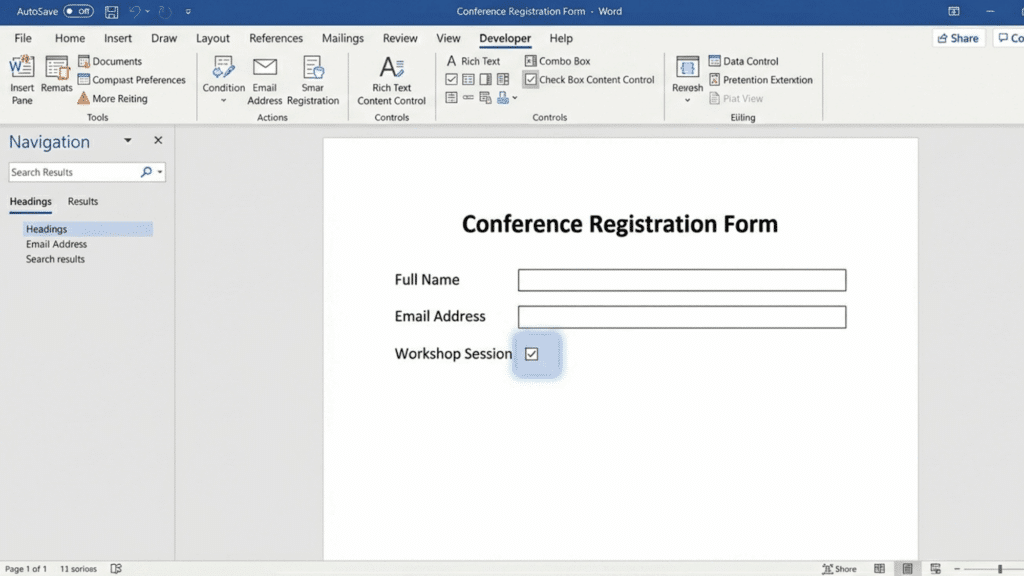
Step 2: Insert a Checkbox (Select Box)

Now comes the main part, adding the checkbox where you want it in your document. This is what users will click to select or unselect an option. Place your cursor where the checkbox should appear.
Then go to the Developer tab and click on Check Box Content Control. A clickable checkbox will appear instantly in your document. You can now use it for lists, forms, or selections.
Step 3: Add Labels Next to Your Checkboxes
A checkbox alone isn’t very useful; you need to tell users what they’re selecting. This step helps you make your form clear and easy to understand.
Simply type your label (like “Yes,” “No,” or any option) next to the checkbox. Keep the wording short and clear so users don’t get confused. You can repeat this process to create multiple options in a list.
Step 4: Customize Your Checkboxes (Optional)
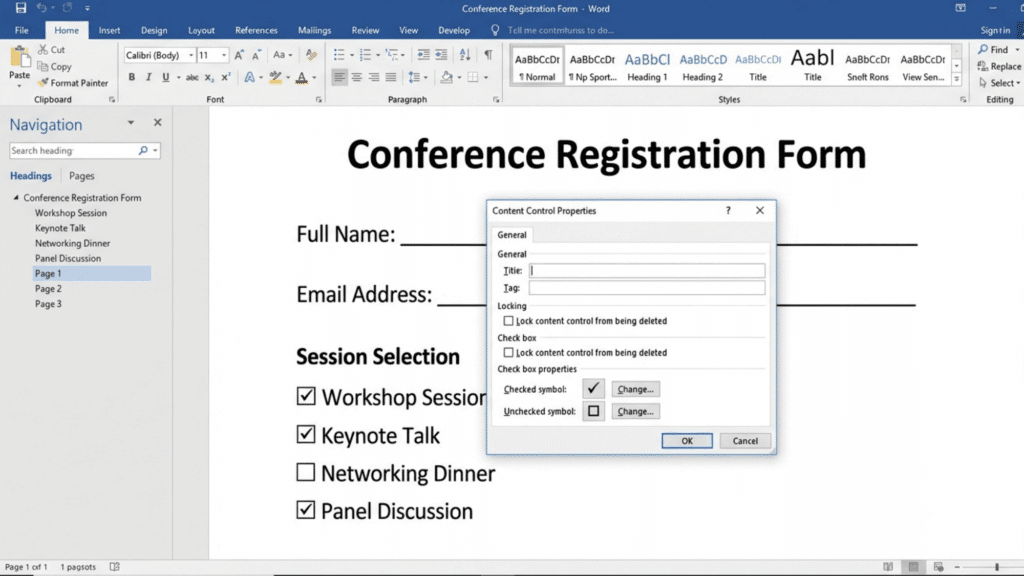
If you want your document to look more polished, you can tweak how your checkboxes appear. This step is optional, but it helps improve the overall look.
Click the checkbox, then open Properties from the Developer tab. You can change the checked and unchecked symbols or adjust formatting. This is useful if you want a more professional or branded look.
Step 5: Test Your Select Boxes
Before sharing your document, it’s always a good idea to test the checkboxes. This ensures everything works smoothly for the end user.
Click on each checkbox to see if it checks and unchecks properly. Make sure spacing and alignment look clean. A quick test helps you catch any small issues before sending it out.
Conclusion
So that wraps it up. Two simple features, both of which make a real difference in how a Word document looks and works. Dropdowns and checkboxes, together, turn any basic document into something people can actually use
It does not take long to set up. A few clicks, a quick test, and the form is ready to go. All you need to do is set it up once, save it, and reuse it whenever needed.
Because it is simple, practical, and worth every minute spent on it.